Showing posts with label recipe. Show all posts

Tuesday, March 19, 2013

Vegan Fudge: Traditional Homemade Candy - A Step by Step Photo Guide

A truly vegan guilt free fudge, made with organic and Fair trade ingredients!

I don't make nearly enough fudge for the family and for gifts.  I made it so much for the shop that it became a bit of a chore.  But lately, I've been trying to create a habit of whipping some up for special occasions and holidays like Yule gift giving. For Lupercalia last, I poured a batch for my daughter's class in lieu of the more grown-up celebrations.

Actual fudge isn't the bizarre current fashion of brittle pre-cut oversweet crumbles or "instant" recipes of marshmallow cream or melted chocolate chips. Though those are now considered the norm, they are modern and rather inadequate adaptations of the traditional candy, which requires some skill to make.  It's uncommon now to find someone who practices the techniques, other than London High Street candymakers, so until they try the fudge from the StillRoom, most people haven't ever eaten it.

Traditional fudge is a real candy; cracked sucrose heated to a certain temperature.  Since it requires some specialization, as well as access to sugar, this is a relatively modern confection, originally only available to the upper class in the middle ages and working its way down to the rest of us when sugar and high heat cooking became more available.  Although the traditional method takes far more time and care than current industrial techniques, the final result, being much healthier and eco-friendly, is totally worth the effort to learn. People will be impressed that someone still knows how to do this!

I always go to the horse's mouth for my research. Whether it's Roman naturalism treatises or early medieval physician documentations (those I have to get in translation still), to late medieval stillroom books and Victorian household encyclopaedia  I look for the original techniques and uses before I try adapting something.  In the case of fudge and candy making, they were an encouraged art for amateur cooks and a requirement for professionals up until the 70's.  So to get ideas about how to re-create them for today's audience, but still keep the best of the traditions, I refer to cookbooks and instructions from the 60's all the way back to the Tudor era.  In this post, I'll take out most of the guesswork and distil down the best of the techniques for you.  As it were..

Candy making is one of the most dangerous ventures in your kitchen.  Fudge isn't as bad as some, but candy is a thick burning syrup that sticks to your skin and clothing, and doesn't come off easily.  Think Napalm.  When you attempt any candymaking, make sure the kids are busy, the pets aren't underfoot, and no one is running around your workspace.  It is unforgiving, and there are few second chances.  If you get it on your skin, have some comfrey, tea tree, aloe or lemon juice ready.  Only the comfrey will ensure you have no scars, but the others will help you use that hand again in less than a month..  (Experiences of the Candy Maker story no. 1)

1. The Pot


Your choice of pot is pretty crucial.  It has to be nearly three times bigger than the amount of ingredients you first put in it, and it has to be comfortable handling very high heat for a fairly long period. So for a pound of fudge for example, I use a Dutch oven.  If you select too small a pot, you won't be able to correct your choice easily once you get started, since you do not want to attempt to pour splashing candy from one pot to another, and the only alternative is letting it bubble all over your stove.  (Experiences of the Candy Maker story no. 2)

The sides of your pot need to be coated in a fat. Don't worry about the bottom. I used to use butter, but it's not necessary.  The vegan version works just fine with vegetable shortening, cocoa butter, or coconut oil.

2. The Ingredients


For 1/2 lb of fudge:

2 cups sucrose (dehydrated sugar cane juice is what I use.  It's a whole food, and works the same as white sugar. Beet root sugar theoretically will also work.)

1/3-1/2 cup cocoa (I use fair trade organic cocoa, which is much stronger than regular, so compensate accordingly if you don't have any.)

pinch salt (artisan sea salt means I use much less, and it's good for you.)

2/3 cup water (I use filtered.  I can easily taste chlorine, and it can create weird reactions in cookery.)

Try not to get the sugar on the sides if you can.  It will make your job slightly harder later.

3. The Cooking


Stir on the stove while heating.  It will take awhile to combine properly, and continue to mix and stir until it starts boiling. Don't worry too much about the clumps of cocoa, but do be careful not to get sugar on the side.  If you do, scrape it off with your spoon or even a rubber spatula, if you're fussy...  It will start to get very satiny before it starts to bubble.

Then stop, and take the spoon out.  Set your spoon aside and let the candy bubble.

See how big it gets?
Get out your candy thermometer, and place it in the candy, without touching the bottom of the pot.  For fudge, you require the Soft Ball stage, or 235-245F. (about 112 - 118C for most of the world). Check the reading by getting down and looking at eye level.  A few degrees can make all the difference in candy making.

I usually stop at 240F and, depending on the pot I use, it will rise a bit before it starts cooling. I also use  the highest heat setting, but you may want to turn it down as it approaches the correct temp, since it can rise quickly.

My home ec teacher was a true professional, and I remember at least one experiment with candy making where we didn't even use the thermometer, but instead used the ice cold water method, so we learned how each candy stage 'felt'.  For stillroom work, I use the far easier temperature gauge, which is what I recommend here.

Turn off the heat and just let it sit without movingIt will fall quickly.

Get your pan ready.  If I'm shipping or giving the fudge away, I use a disposable or reused tin.  If we're keeping it for home, a cake or pie pan will do. After washing, make sure the pan and lid are thoroughly dry.  Any water droplets can mar the surface look of the fudge. Grease bottom and sides.

Now find something else to do with yourself for a bit.  I try not to leave the kitchen or watch TV, in case I forget what I'm doing, but your fudge needs to remain undisturbed while it cools.  You can leave the thermometer in if you like.  You are waiting until the temp is about 110F, or 45C.  I just use my hands near the bottom of the pot. If it's uncomfortably hot to the touch, it isn't ready yet. Wait until it's still quite warm, but not too long!

4. The Beating


Now comes the trickiest and fussiest part.

Testing, testing...
Using a new, clean, dry spoon, add your flavouring.  I often use the traditional 1/2 tsp. vanilla (organic and fair trade feels good and tastes better, so you use less.)   Mix in and begin to beat the fudge.  Depending on how hot it was, this can take a while. Watch carefully under a good light source. Keep beating until you begin to see the gloss start to disappear with each stroke, and the fudge become heavier and thicker.  Pour into your pan.  Many do not recommend scraping the sides into your pan.  I only suggest it after you have filled your pan, and you want to eat - I mean, test - your batch.  If I am giving it away, I don't want to take a chunk out to test it, which would totally mar the look, so I use the remainder that is scraped on to the spoon.  Mmmm...testing...

(Illustration from Better Homes and Gardens: circa 1966.) 
For home use, score the fudge while it's still warm, to facilitate cutting it later. When I present my handcrafted fudge in the traditional manner for shipping and gift giving, it is sealed when cool, unscored and untouched, until opened by the recipient. Stays softer that way, too, and doesn't get all broken up in transport.

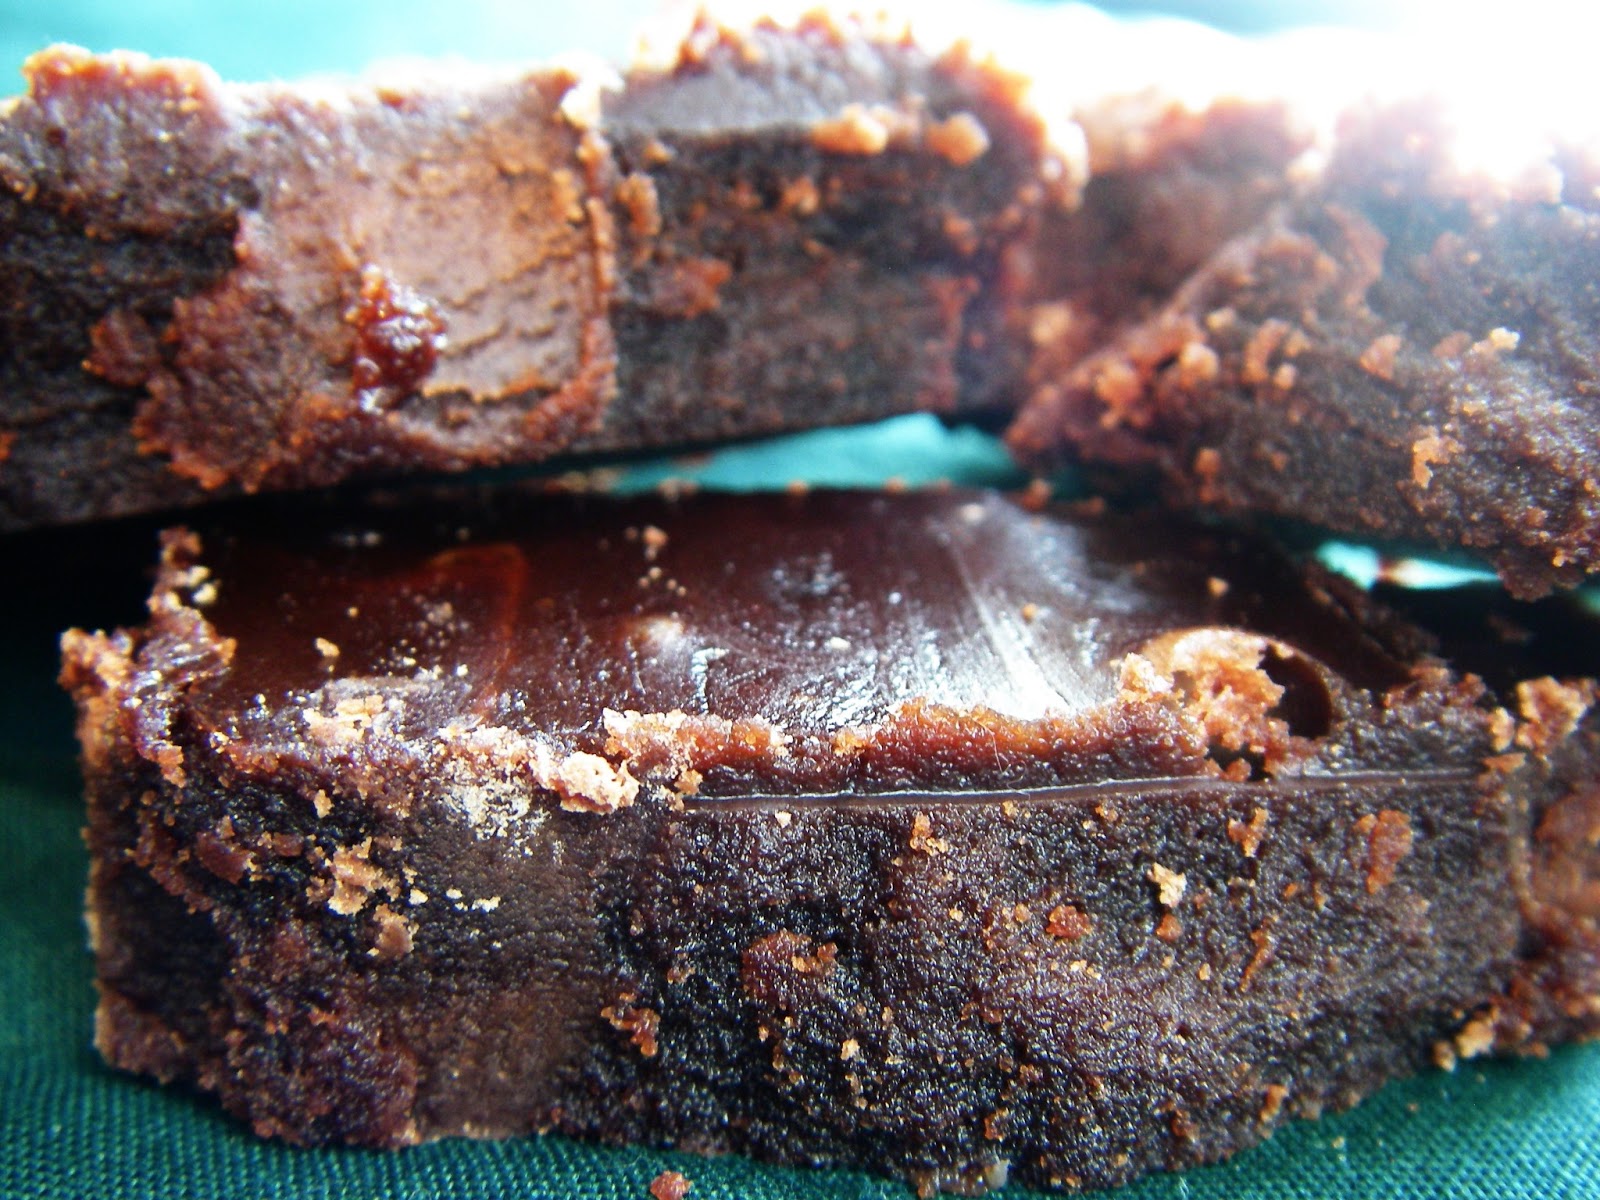
After completely cooling, your fudge should be soft, moist, even grained, and satiny.  If it's not entirely perfect, and isn't completely far gone, a good freezing will fix most errors. Freeze completely, and when it's totally thawed out again, its structure changes to a better grain.  Only freeze once, though, and don't refrigerate after. It turns into a pudding.

Is that a dinosaur print in my fudge? No, that's a kitten track.
Remember to cover your fudge when cooling!
Fudge is a tricky and fickle candy, so occasional sloshes on the side or drops of water can ruin its perfect surface, but fortunately my skill makes such incidents rare.  So you'll need to practice!

5. Variations on a Theme


Herbs


Remember when your food was your medicine and your medicine your food?

From horehound candies to spruce beer; from real marshmallow to liquorice, Western herbalists have traditionally created tasty treats to tempt those under their care to take the vitamins, minerals, and remedies they needed. In the spirit of that ancient protocol, I often add medicinal or nutritive value to my fudge with herbs, or vary the flavours with different additions. Because it's just not magnificent enough already...

Substituting the water with an herbal infusion of organic herbs means the sky's the limit.  Cool and filter with cheesecloth first, of course.  Even one stray leaf will be most unpleasant in a soft, moist, even grained fudge, if it doesn't ruin it completely. I've never found an herb that noticeably affects the flavour of the fudge, so consider what effects you're interested in, rather than worrying about blending the flavours.  Don't forget to use a non-reactive pot for cooking your fudge, too, if you want the herbs to be at their best. Some suggestions are:

*Nettle and Dandelion leaf, which has oodles of vitamins and minerals, including iron, and helps prevent allergic histamine reactions. Forget to take your calcium? Can't stand your iron supplement? Need more B's? This will make you look forward to your daily dose.

*Wild yam, Dong Quai, Vitex, Cohoshes, Cramp Bark, and Licorice Root can make a PMS or Menopause fudge to replace and replenish your hormones.  Who needs Midol?  I have fudge!

*Immune Boosting - Elderberries, Echinacea p. and a., Astragalus, Ginseng, there are so many...  I mean, if your kids are gonna eat 'em anyway..

*Ginseng, Sarsaparilla, Yohimbe, and Damiana can add spark to any adult encounter.  Seriously.  Use this one sparingly.  It totally works..

Flavours


Like it extra chocolatey?  I know I do, so I often double the cocoa powder.

Feel like a mocha? Add expresso as part of your water component.

Organic oils are much stronger than flavoured oils, with no aftertaste.  They are added just before the beating, instead of vanilla. We have experimented with many in the stillroom.  Some of our usuals are:

*Peppermint: Careful.  Organic peppermint is very powerful.  A few drops are all that's needed.
*Sweet Orange.
*Rum
*Brandy
*Lavender. Traditional, believe it or not.

Tips


Candy making is pretty impressive organic chemistry.  You are changing the molecular structure of the sugar, so certain conditions must be met, or it just won't work.  Sugar stops melting at boiling, so make sure all of it is mixed and off the the sides of the pot before it starts to boil, since those grains won't be able to melt after that.  Why is that important?  Because, like honey and syrup, liquid sugar will accrete around any stray particle, especially unmelted sugar, and crystallize completely.  Once that happens, there is almost nothing you can do to save your candy.  It will be inedibley grainy, and even freezing won't fix it.  That's why you need a new spoon to beat with, too.

I therefore air dry, rather than towel dry, all of my equipment where possible, just to be extra cautious of stray particles.

Beating also alters the candy.  The longer you leave it to cool, the quicker it will turn when you begin to beat. If you start too early  it will take forever, but don't wait too long, or the entire thing will set in your pot in a flash.  If you pour before the candy has altered enough, it will be grainy, but usually edible.  Freezing will help that mistake the most.

It's easy to double batch, but triple gets harder.  You need an extra big pot, and strong arms to beat that much candy.  Don't say I didn't warn you...

Not the industrial brittle pre-cut candy most people are used to; this is the most moist and creamiest fudge you've ever tasted, and absolutely guilt free chocolate!  Let me know how your experiments go, and good candy to you!

Monday, November 12, 2012

Four Thieves Vinegar: Non-toxic & Natural Disinfectant & Cleanser


From what evidence we have, infused vinegars have existed almost since we first discovered vinegar.  It's so useful by itself, and infusing it increases its effectiveness and potency.  Its many functions include:


- culinary

- preservation
- beauty regimes
- cleansing
- disinfection
- anti-infestation

I have gone into detail on some of the cosmetic vinegar infusions in this post.  Now would be the time to start making them for the holidays, if you were considering giving them as gifts, by the way...


Herbally infused vinegars are natural, organic, non-toxic, inexpensive, traditional technology that used to and still can replace so many of our modern products.  They can be full strength for cleaning and disinfecting, as an insect discouragement or anti-fungal. With the proper ingredients, they are remarkably effective against bacteria, as well as an efficient cleanser which leaves a refreshing scent. I personally have used the diluted spray to cure my apple trees of a debilitating fungus that had been plaguing them for years. I also got rid of the aphids on my Virginia Creeper and created a scent barrier against ants getting into my house.


Diluted, often with rosewater, it was used as a cosmetic, to tone the face, clear up eruptions, refresh clothing, and in a sponge nosegay, was kept near the face to ward off the Plague. Certain physicians are still called quacks due to the medieval practice of wearing a duck-like mask with a sponge of aromatic vinegar resting in the beak when visiting areas of contagion. Perhaps it's currently an insult to call a doctor a quack because it implies their techniques are right out of the Middle Ages.


It should be used only with extreme caution during pregnancy, as some of the herbs are abortifacient. I used it when I was pregnant with my son to no ill effects, but I took care not to get any on my skin.


Four Thieves Oil is a very modern invention, and not the same thing at all.  It usually contains essential oils of similar herbs, but oils and aqueous infusions do not often share the same properties.  It cannot be used for all the same purposes as the vinegar formulations, and are often far more expensive.  Though it apparently can be used for similar magical purposes, such as banishment, in Vodun and other systems...


The first actual record we have for the version known as Four Thieves is not medieval. If it is indeed an actual record. Most of the "documentation" are really stories. I will take the liberty to re-post this excellent history.  (I'd credit it if I knew the original source, but this exact version is all over the 'net.):

The famous French aromatherapy doctor, Jean Valnet, has two recipes in his book. He claims the original recipe was revealed by corpse robbers who were caught red-handed in the area around Toulouse in 1628-1631. His story is the more credible of the many one can find. Given the virulence and deadliness of the plague, the judges were astonished by the indifference of the thieves to contagion. Valnet quotes the archives of the Parliament of Toulouse:
During the Great Plague, four robbers were convicted of going to the houses of plague victims, strangling them in their beds and then looting their dwellings. For this, they were condemned to be burned at the stake, and in order to have their sentence mitigated, they revealed their secret preservative, after which they were hanged.
Given the source, I choose to believe the Valnet account, but there have obviously been many spins of the tale. Here is the recipe stated to be the original:
  Original Recipe for Four Thieves Formula
3 pints white wine vinegar
handful wormwood
handful meadowsweet
handful juniper berries
handful wild marjoram
handful sage
50 cloves
2 oz. elecampane root
2 oz. angelica
2 oz. rosemary
2 oz. horehound
3 g camphor
Dr. Valnet has a variation of his own described as an antiseptic vinegar:
Marseilles Vinegar or Four Thieves Vinegar
40 g. greater wormwood, Artemesia absinthum
40 g. lesser wormwood, Artemesia pontica
40 g. rosemary
40 g. sage
40 g. mint
40 g. rue
40 g. lavender
5 g. calamus
5 g. cinnamon
5 g. clove
5 g. nutmeg
5 g. garlic
10 g. camphor (do not use synthetic camphor)
40 g. crystallized acetic acid
2500 g. white vinegar
Instructions: steep the plants in the vinegar for 10 days. Force through a sieve. Add the camphor dissolved in the acetic acid, filter.
Valnet says his formula is useful in the prevention of infectious diseases. He says to rub it on the face and hands and burn it in the room. It can also be kept in small bottles that are carried on the person so that the vapors can be inhaled.

Years of experimentation using historical and modern recipes have helped create my interpretation of this legendary liquid. My version is an amalgam of several different recipes, taking into account what was commonly available, especially in England, during the medieval period, and what was in my garden fresh.  It is a concoction of white wine vinegar steeped in aromatic and anti-bacterial herbs such as garlic, rue, and wormwood for a number of days, then filtered and used in dilution with water for cleansing the house and other areas.


Remember:  Only use real, brewed vinegar for all these recipes. Ordinary store bought white vinegar is just lab-created Acetic Acid diluted to 5%.It doesn't have the same richness of composition or balance of acids as real brewed vinegar, or the same sustainability. Try these recipes with other base vinegars, too, such as apple cider and rice wine! 


Here is my exact recipe, for those that want to try it at home, or who just want to see how crazy I get when I make these things.


My Four Thieves Vinegar Recipe:


Approximately the same sized twig piece of each:

fresh peppermint
fresh thyme
fresh rue
fresh rosemary
fresh wormwood
fresh sage

four cloves garlic (slightly crushed to release the allicin)
3 bay leaves
4 cloves
4 small pieces cinnamon bark

Place ingredients in old, clean, spaghetti jar. Fill remainder of jar with white wine vinegar, stir to get rid of bubbles, add lid, and place in sunlight, like windowsill. Herbs will lose colour after a few days. Then you filter and can add a bit more herbs for a really strong batch.

Filter out completely in a few weeks, bottle and label.


Article published on Witchvox on December 30, 2012.

Monday, November 5, 2012

Stevia: The Miracle Sweetener & How to Use it!

Dried Stevia

"What if there were a natural sweetener that:

Was 300 times sweeter than regular sugar, with minimal aftertaste
Had no calories
Was suitable for diabetics
Appropriate for children
Did not cause cavities
Was heat stable and thus could be used for cooking and baking
Was a great alternative to synthetic sweeteners
Easily blended with other sweeteners, such as honey
And already widely and safely consumed in many countries around the world for decades.


Well, this remarkable, no-calorie sweetener called Stevia is, unfortunately, not a household name. It should be... With the availability of Stevia, there seems to be little reason to use artificial sweeteners such as aspartame and saccharin."

Humans have used Stevia for centuries with no known side effects. The Japanese and others have been using it commercially to sweeten their treats for decades.  People who have little tolerance for sugar or other sweeteners can use Stevia leaf or Stevia extract. Studies suggest that Stevia has a regulating effect on the pancreas and could help stabilize blood sugar levels in the body, due possibly to its Chromium component, therefore making Stevia a better choice for people with diabetes, hypoglycemia, and those prone to Candida. Traditionally Stevia is indicated as a cardiotonic, anti-gas, and for obesity. Stevia is also used to reduce acidity (heart burn), hypertension, and to lower uric acid levels. Research suggest that Stevia will fight bacteria in the mouth. The sweetening power of Stevia extract is estimated to be 300 times that of sugar. Both leaf and extract may be used in cooking.
 
Diabetes and Hypoglycemia
Scientific research has indicated that Stevia regulates blood sugar levels, bringing it to a normal balance.

Weight Management
Stevia contains 0 calories, making it the ideal sweetener for any weight loss or weight management diets.

Cardiovascular
Studies have also shown that Stevia works as a cardiovascular tonic, lowering high blood pressure.

Bacteria
Stevia inhibits the growth and reproduction of bacteria and other infectious organisms like those that cause colds, flu and dental caries.

Skin care
Applied as a face mask, Stevia smoothes out wrinkles and is effective in healing acne and in treating seborrhea, eczema and dermatitis.

Digestion
Taken as an herbal tea, Stevia improves digestion and gastrointestinal functions and effectively soothes upset stomachs.

Raw Leaf vs. Extract


I have the fresh leaf in my garden, which of course is the cheapest to use.  However, the fresh leaf can't be substituted directly in recipes that require sugar.  I can dry it in the winter, and then powder it, of course, which is still far cheaper than the prepared forms in the health food stores.  Those have a purpose, though, too.  They are standardized, fully prepared and completely water soluble, so it might be worth paying the premium to know exactly how much you need, and not to have to filter all those darn leaves.  Easier to carry around with you to use during the day, too.

So be careful in the recipes below!  Keep in mind which concentration level of the stevia you are using is.  Raw form is of course far less powerful than extract, but the price certainly compensates for that...


Recipes and Suggestions for Use:


For teas, infuse the raw fresh or dried herb as usual in with your other black or herbal leaves.  No need for additional sweetener!
When substituting and experimenting with your stevia in cooking and baking, remember that it has no calories, so it doesn't provide the nutrients needed for rising yeast, for example. The raw or dried leaves can be made into an infusion, filtered, and directly included as the liquid component in recipes using water or milk for most purposes, though. It's far cheaper than the concentrated health food store version, if a bit more of a bother.
How to make herbal infusions:

Get inventive, and send us some of your suggestions!
Easy Ginger Ale
YIELD: 8-OUNCE SERVING

3 ounces ginger syrup (see below)
5 ounces sparkling mineral water
ice cubes

Pour the syrup into a 10-ounce glass and add the ice cubes. Slowly add the sparkling water. Stir and serve. 

Homemade Ginger SyrupYIELD: APPROXIMATELY 4 CUPS

With minimum effort, you can make this flavorful stevia-sweetened syrup to have on hand whenever you're in the mood for a refreshing glass of sparkling ginger ale.

4 cups water
4-or 5-inch piece fresh ginger
1/2 teaspoon white Stevia powder
2 tablespoons vanilla flavoring
1 tablespoon lemon extract

Peel and finely chop the ginger. Bring the water to a boil in a small saucepan. Add the ginger and Stevia, reduce the heat to low, and simmer gently for 8 to 10 minutes. Strain the liquid into a heat proof container, and stir in the vanilla and lemon. Covered and refrigerated, this syrup will keep for several days.


Flourless/Sugarless Chocolate Cake (non-vegan)
Ingredients:
14 oz semi-sweet chocolate chopped
3/4 cup plus 2 TBS. unsalted butter
10 egg yolks
1 tsp. Stevia
1 TBS. vanilla extract
1 tsp. lemon juice
10 egg whites
1/2 tsp. Stevia
2 cups heavy cream, whipped

Instructions:

Melt chocolate and butter in top of double boiler, or in microwave. Set aside to cool slightly. Beat yolks and the Stevia until smooth; stir in vanilla and lemon juice. Blend in chocolate mixture. Beat egg whites in large mixer bowl until soft peaks form. Gradually add 1/2 tsp. Stevia, beating until stiff peaks form. Stir 1 cup whites into chocolate mixture, then fold in remaining whites. Pour batter into a 10 or 12-inch pan which has been greased and floured and lined with wax paper. Bake in a preheated over at 250 F for 2 1/2 hours. Cool COMPLETELY on a rack before removing from pan. Serve with whipped cream.


Grandma’s Apple Pie
Yields a 9 inch pie

Pastry for a 9 inch, 2 crust pie
6 cups peeled and thinly sliced pie apples
1 or 2 teaspoons fresh lemon juice
1 1/2 teaspoons Stevia Extract Powder
2 to 3 tablespoons whole wheat pastry flour
1/4 teaspoon nutmeg
1 teaspoon cinnamon
Dash of cloves or allspice
2 tablespoons butter

Fit bottom pastry into a pie dish. In a large mixing bowl sprinkle lemon juice over apples and stir to mix. Using a cup or small bowl stir together Stevia, flour, nutmeg, cinnamon, and cloves or allspice. Sprinkle spice mixture over apples and carefully stir to coat apples. Pile apples into crust. Dot with butter.

With water, moisten the outer rim of the lower crust. Place upper crust on pie and crimp edges together. Slit top of pie to allow steam to escape. Place on a cookie sheet. Bake at 350 degrees in a preheated oven for 55 to 60 minutes. Aluminum foil can be placed over the pie during the last 15 minutes to prevent over-browning.

Cool on a rack, cover and leave at room temperature overnight or refrigerate if you like. This pie is delicious at any temperature.


Pesto SauceYields 1 cup sauce

This unique herbal sauce freezes well for later use. Goes on sandwiches, salads and pasta dishes or by itself on bread or crackers.

1/2 cup parsley leaves, stems removed
3/4 cup chopped fresh basil leaves
1 clove garlic, peeled and chopped
1/4 cup vegetable oil (olive oil if you prefer)
1/16 teaspoon salt
1/8 teaspoon Green Stevia Powder
1/4 cup chopped walnuts
3 1/2 tablespoons Parmesan cheese or Parmesan style soy cheese

Process in a blender the parsley, garlic, oil, salt and Stevia. Push down the sauce with a rubber spatula as needed. Add remaining ingredients and blend. The sauce need not be entirely smooth. Refrigerate in a covered jar.


Stevia face masque/ Stevia liquid
Ingredients:

Green Stevia powder

Instructions:

Brew like tea. Mix residue with extra virgin olive oil. I keep it in the fridge. When this is smoothed on the skin, it is like a cool breeze blowing on your face. Let it dry. When it has dried, rinse off. Your face will feel sooooo smooth and soft. Took 5 years off my face, even a friend noticed how relaxed I looked!! Nothing like "recycling" your Stevia leaf. Extra paste can also be stored in the fridge for two or three days.


Lemon Ice Cream 
Sweet cream with a lemon zing.Yields 6 servings

1/2 teaspoon Stevia Extract Powder OR 1 1/2 to 2 teaspoons Green Stevia Powder
1 cup milk, skim or whole
1 cup whipping cream
1/4 cup fresh lemon juice
1/8 teaspoon lemon extract

Combine Stevia, milk, and cream in a small, deep mixing bowl. Stir to dissolve Stevia. Cover with plastic wrap and freeze 1 or 2 hours until solid around the edges.

Remove from freezer. Add lemon juice and extract. Beat thoroughly and replace the plastic wrap. Return to freezer.

After 2 hours beat again. Freeze some more until consistency is firm but still soft enough to dip. This entire process requires about 6 hours and very little effort.

For leftovers, remove from freezer about 1/2 hour before serving to allow for softening. Whip again if desired.


Variations:

The amount of Stevia and lemon extract can be varied according to taste. Equal amounts of lemon extract and vanilla extract can be use.

Vegan: In place of dairy milk use soy milk.


Vegan Noggin
2 10 oz pkgs. silken tofu
16 oz vanilla soymilk
1 TBS. plus 1 tsp. vanilla
1/4 cup sugar
2 TBS. brown sugar
1/4 tsp. ground turmeric
1/2 to 1 cup brandy or rum
nutmeg to taste

Combine everything except nutmeg in blender; blend 'til smooth. Serve chilled and dusted with nutmeg.

Saturday, July 30, 2011

Baking Soda - Appropriate (and Cheap!) Eco -Technology - 60's Era Ephemera


I do hope I'm not breaching any copyrights by publishing this, but it's just too dreamy...  To take the curse off it, I'll break my usually infallible rule of no advertising to include the brand name of my little baking soda book.

I love this book.  My cakes never come out as good as the one in the picture, mostly because I'm not prepared to go to the effort to make the right traditional frostings just yet, but it's what I aspire to.  Despite the proliferation of ready made deserts and instant cake mixes, a domestic cake made by an expert, like the one in the picture, is a marvel of simple equipment, no special ovens, and completely scratch ingredients that we just don't appreciate anymore!

The purpose of this post, however, is to do a service by publishing this wonderful piece of 1960's North American vintage literature for your edification. It's valuable for students of costume and design, anthropologists of recent eras, and of course, lists all the many things you can do with baking soda that most of us have forgotten. I mean, who uses the perfectly good word "dentifrice" anymore? The silver polish magic alone is worth the price of admission. And who lets that baby stay in the bath with a toothbrush in it's mouth? The scarf protecting our housewife's coif is darling enough, but my favourite image has to be the gloved hands snuffing out cigarettes in the giant car ashtray!


My sceptical mom still recommends soda baths for hives and irriations!
This is a 1969 pamphlette with lovely recipes that tries to encourage the use of soda in baking in particular, just as it was going out of fashion in favour of baking powder.  And why not?  The acid shift required to create the chemical reaction for soda makes it more difficult to use it for cakes and cookies, while baking powder acts with mere water.

The diapers on this baby are cloth and were left to soak between use and laundering.
I remember this being in my mother's collection, so it may have been in our family since it's date of publishing. Or maybe I picked it up at a thrift store. I've had it for so long, I'm sure I've forgotten by now... I use many of the recipes in this book, as well as many other vintage books, for the simple reason that most of them are far better than the ones in most modern books. The recipes assume some competency and skill with cookery, they don't usually cut corners, and they go into detail on presentation and technique. The results are almost always superior to comparable modern recipes, and learning the basics of what you are doing as well as why can help one become a better artist. It's only with the vintage recipe books that I have been able to reCreate so many traditional candies, pastries, beverages, and other edibles that make up our Stillroom and Global Peasant repertoire.

If anyone has any vintage caramel toffee or other great traditional recipes, I'd love to see 'em.  One of my future projects is petite fours!

Friday, June 24, 2011

Chinese Fried Rice - A Step by Step Photo Guide - Recipes: Organic & Vegetarian


I'm often asked what "you people" eat when the subject of diet comes up. Not that I usually bring it up myself, mainly because of questions like that...

Cookery is the homier dance partner of Still Room work and a vital component of what we teach. Most of our research and experiments in reClaiming appropriate technology focus on ancient and medieval European writings and practices. However, trying to reCreate the diet can be problematic. Most of the writings focus on specialty items, feast days, high caste foods and other unusual or rare dishes. Though the European settlers were mostly peasants, the current standard North American diet is no help, either in reCreating diets of the past or an evolution of the future. It's largely a corruption of the meat intensive "rich man's" food, coveted by the non-Native peasantry that ended up here, altered by poverty as well the traditional native foods found in their new home. It's high fat, high salt, low quality, limited variety, and mismatched combinations are one of the primary sources of illness in this culture. To be healthy and to encourage health, the cornerstone must be diet. Studies have shown that the best way to achieve that is proper knowledge and practice of cookery. Although we do attempt authentic medieval dishes, there are much more available traditional sources to draw upon in our day-to-day living. As part of the Global Peasant movement, we specialize in traditional peasant cuisine from around the world. Traditional peasant foods are tasty, incredibly inexpensive, and can usually have most ingredients locally sourced. They are traditionally organic and much more nutritious. Traditional foods from mature cuisines have also been time-tested sometimes for thousands of years with the correct and appropriate food pairings - combining the proper proteins, carbohydrates, and other best nutrition factors. In most parts of the world, peasants do not have access to large amounts of meat, as it is usually a higher caste or price item, and therefore most peasant cookery is intrinsically vegetarian. They usually require less cooking time or prep from limited fuel supplies, and so have less vitamin degradation than more longer cooking dishes. It has very little, if any, waste. Cooking as a Global Peasant is therefore one of the healthiest, cheapest, easiest, and most eco-friendly practices available.

I have been focusing on specific Chinese and Indian regions for the past few years. To ensure proper food combinations, I never mix cuisines in any one meal, unless it's a traditional fusion. Like Indian/Chinese! Which I now have to study up on...

Here's one of the dishes we enjoy regularly. It's incredibly simple and can easily be converted to a vegan version. It makes use of pre-cooked rice from previous meals, as well as pre-cut veggies from others, so it's non-wasteful and budget-stretching.


Chinese Fried Rice

This is such an easy dish!  If you have rice in the freezer, and choose to microwave it to defrost, it can take you about 7 min. start to finish to build this tasty, nutritious creation! Less if you have some cut, raw veggies sitting around...

Like many Chinese dishes, many of the ingredients are cooked separately, and then combined just before finishing. According to Jeff Smith in The Frugal Gourmet Cooks in Three Ancient Cuisines: China, Greece, and Rome , "in order to bring each food product in a particular dish to its own point of fulfillment, you must cook several ingredients separately, and then join them together in the wok at the last moment. In this way you have contrast in both flavor and texture, all in the same dish."

I use a small carbon steel wok for this. It's just the right size, imparts some iron, is highly efficient, and needs very little oil to cook with.  One of the perfect Global Peasant cooking tools!  I use my wok for everything.  A small wok is one of the best kitchen investments you will ever make, if you don't have one already...

Don't forget to use a high heat cooking oil, like peanut, walnut, sunflower, or safflower.  Soy oil won't cut it, since it is completely non-nutritive.  Canola tastes weird, even when organic, and olive should never be cooked, as it degrades into transfats so quickly.

2-3 cups previously cooked rice, defrosted or partly dried
 
I use organic Jasmine rice with nearly all of my Chinese meals. The flavour is incomparable with any other type of Western or conventionally grown rice, as well as being more nutritious and eco-friendly. I usually steam extra for a meal, and put any we don't eat into the freezer. It's vital to this recipe that the rice sit overnight or is left in the freezer to dry out a bit. Wet or fresh rice will clump and not come out right.

1-2 fresh eggs

Feel free to leave these out if you are feeling vegany. I know that eggs often revolt me, but personally, this dish seems a bit incomplete without them. I haven't tried substituting tofu, though...  Again, organic, local eggs are the clear choice for so many reasons, not the least of which is that they are safer and healthier. The chickens are not constantly exposed to broad spectrum antibiotics, and organic eggs are seven times less likely to contain salmonella.


Start by cooking the eggs. Use very little oil.  I find too much makes the eggs a bit greasy. Stir fry. The effect you are looking for is a bit like scrambled eggs. Set aside.


frozen or fresh peas

I find peas to be integral to the dish. I can't even make it without them. If they are frozen, I put them in first for a minute or so. Then the remainder of the veggies. It's the only time I cut up carrots like those little cubed frozen ones. It's more fun, and rather like the take-out style. Same with the mushrooms, and sometimes the peppers. Onions, scallions, whatever you like! I often use pre-cut veggies from a previous meal, say from tacos or falafel. Anything we didn't use gets saved for a day or two, and goes into fried rice or omelets.


Veggies should be about the same size, for ease of cooking time and for the look of the dish.

This is the time to sprinkle in your seasonings.  Salt, pepper, and maybe some five-spice powder, fennel or anise. After a few minutes of cooking, set aside on the same plate as the eggs.


Defrosted jasmine rice in wok
Time for the rice!


Make sure it's pretty well thawed, and stir fry with a bit of oil to remove any clumps.  Add the soy sauce or tamari.  Again, only organic is recommended, since it is made with non-GMO soybeans, which should be avoided.  Just a little!  A tablespoon or two.  It's easy to overdo it, and your guests often add a bit more to their taste at the table.


Rice sprinkled with tamari

After cooking for a few minutes, it should be pretty cooked through and mixed with no lumps.
 

Rice stir fried.


Now add the rest of the ingredients. Stir fry for a few moments, reheating and distributing evenly.


Your dish is complete! I usually just serve it in the wok itself. Eat alone for satisfying lunch or snack, or as an accompaniment to a larger meal.

Now I'm all hungry...

Tuesday, January 4, 2011

How to Brew your Medicinal Tea: A Quick Refresher!


I include these instructions with every herb purchase from my shop.  It's the quick version to get the most benefit out of herbs for those who are just starting out.

Suggested dosage: Begin with one teaspoon of herb per cup of water, then adjust for taste and effect desired. As some herbs do not fall to the bottom, we recommend using a tea baller or cheesecloth.

To get the most out of your medicinal tea, use fresh and cold, spring or distilled water.

To change the flavor, herbs may be blended with other herbal teas, such as peppermint, fennel, lemon balm, etc. without loss of potency. Any unprocessed sweetener can also be used in your tea, such as honey, maple sugar, stevia, etc. For maximum benefit, we do not recommend white or brown sugar.

Herbs, Leaves, and Flowers (Infusion or Tisane)

Measure out herb into cup or pot. Heat water in kettle. Pour into teapot or cup as soon as it begins to boil. Place saucer or lid over tea for 5 to 10 minutes for proper infusion. Drink immediately.

Hard Barks, Roots, and Berries (Decoction)


We recommend dedicating a small saucepan as your herb pot. It must be non-metallic, as metal will react with your brewing herb. A glass or enamel pan is best. Bring water to a boil, then drop in your herb. Turn down heat. Let simmer for 10-20 minutes, depending on the size and thickness of the herb. Drink immediately. For the quicker version, add herbs to pot, bring to boil, then immediately turn off burner and let cool.  Works best if you are brewing a bigger batch and are going to finish the rest of the concoction over a day or two and can therefore afford to let it sit.

To make enough for several days:

Use the same amount of water as for a single serving but double or triple the amount of herb and brew as usual. Place in glass or ceramic container, never metal or plastic, and refrigerate. It will keep for about 3 days. To use, do not reheat but add several teaspoons as desired to juice, herbal teas, and other natural beverages.
 
One can be very creative with herbs, and many forms of ingestion exist. I know many who eat both fresh and dried herbs for the medicinal benefits, sometimes as food, infused in oils, make into candies and treats, brewed into alcohol, or just straight out of a bag! Sometimes it's easier to incorporate herbs in your lifestyle by making only a very few changes. For example, putting the fresh, dried, or ground herbs in your espresso maker or your French press coffee machine gets a significant amount of the herbs' water-soluble components in your ordinary daily brew! (I currently have Horsetail and Ginseng in my special blend. If you come to my house for coffee, ask for regular grind.) It doesn't work so well in the drip kinds, of course.


Herbs have been our primary form of medicine for thousands of years, and humans have gotten very creative with them. They can be so easy to use, and can provide such great benefits! It requires so very little effort; you simply have no excuse not to discover how easily herb use can integrate into your lifestyle!


Sunday, November 14, 2010

Homebrewed Mead: Traditional Yule


After adding everything together, and before the cloth on top!
My apprentice and I just made mead, and it wasn't nearly that much of a trial as some authors seemed to imply.  I personally think it's easier than canning, which frankly makes me nervous. You almost can't screw up making mead, and it's one of the most sacred and magical tasks we do here in the Medieval Still Room that connects us to our ancestors.  My husband pronounced it as the best concoction to come out of the brewing room yet!

Mead is possibly one of the first alcoholic beverages and has achieved legendary status among many pagans and historical re-enactors as the traditional guest drink of Northern Europe - the beverage of Beowulf, the Viking Norse and the Halls of Valhalla. Druids and Odinists alike embrace it as a extant example of traditional lifestyle and tech, as well as a communion with the culture of the ancestors. Yule, the Norse sacred holiday of Solstice, is not the same without this divine gift of the Gods. Since our modern pagan and Christian traditions were largely lifted wholesale from Yule, in our household, especially as pagans of North European descent, our down home Holly Days cannot be complete without a fine flowing of mead.

Mead is mostly honey based, of course. The yeast can't as easily digest the honey as it can some other sources of sugar, like dextrose or sucrose, so in modern times, either another type of sugar or a chemical nutriment is added to help feed the yeast. We wanted to be a bit more purist, so we added a fruit to our mead, making it technically a melomel rather than a pure mead. The apple tree produced more than enough apples this year, so our fruit component was an easy choice. To help access the nutrients, a bit of acid is recommended, usually lemon, so we included that as well.

Like country wines, many recipes suggest bread yeast for mead.  However, since the alcohol component for mead is higher due to the sugars, we chose the recommended champagne yeast. "Beer or bread yeast may essentially be paralyzed when the alcohol concentration reaches 6% to 8% alcohol. Wine yeast can normally tolerate at least 12% to 14% alcohol, and the hardier varieties (with a little help) will get to 18% or so." 1 We do use bread yeast in our country wines and vinegars, which is selected to act quicker but can leave a slightly bread tasty flavour, mostly because it's darn cheap and readily available. However, bread yeast would simply not be able to continue brewing in the mead environment. We also use filtered or reverse osmosis water in all our brewing, mostly to keep out the chlorine. Not only is it detectable to my palette, chlorine is included to inhibit bacteria growth, not exactly what we are going for here...

With that in mind, it was really such a simple process. We melted the unpasteurized honey, fresh and cheap from our local Farmer's Market, and some of the water in a pot. While it cooled, we washed and prepared the apples by cutting them up into fairly big pieces and cutting off all the nasty bits that might ruin the brewing process. We didn't bother to peel them, and I think we even used windfall! We popped those into a big glass gallon jar, like one of those restaurant pickle jars, and once the honey water was reasonably cool, we poured it in with a bit of lemon, the yeast, and enough water to fill it nearly to the top, and did a gentle but thorough stirring. Don't forget to leave enough space at the top to ensure that the brew doesn't gurgle over the edge in it's enthusiasm! We then covered our mixture with a clean rag tightened with an elastic band, which we took off once per day in order to stir the brew.

After the bubbling was noticeably halted, we got out our big funnel, stuffed it with a bit of cheesecloth to filter, and poured the brew into a cider jug. The gravity method, as in letting the apples sit for a bit in the funnel, got out nearly all of the apple bits and other detritus. I suppose we could have used those now alcohol soaked apples for something, like some decadent dessert, but they just went into the compost. Bunging up our remaining liquid with an airlock, we just left the poor neglected thing on the shelf until it cleared up, the yeast fell mostly to the bottom, and the bubbling went down to only two per minute. And it still took about a month!

For bottling, though it's not as traditional, we decided that we wanted sparkling mead, so when we siphoned and re-filtered, we just used old pop bottles that we still had the caps for. I didn't want to dilute our brew, so we plopped in carbonation drops into each bottle rather than use more sugared water to carbonate. We did taste some of the bit on the bottom of the jar, of course, and it was truly sublime. The darn things should be magnificent by Yule, and they are the perfect beverage to bring out for something very special. Even better than our handmade cider! Although it might compare to the applejack I'm making from that...

It really is a snap. Each part of the process only takes about an hour, and you can make as small or as large a batch as you have the equipment and patience for. We didn't even bother to boil the water or honey! Though we did sanitize every bit of equipment before we used it... Helps keep down the chance of souring...

For those of you who want to try this sacred and ancient beverage at home, here's the recipe we used.

3 lbs honey
3 cups water

Heated until it melted in a stainless steel pot. (Though glass or enamel are always more recommended, to reduce the chance of reactions with your brew, especially if you use herbs or spices in your blend!)

6 - 10 apples
lemon juice or concentrate
champagne yeast
enough filtered water to fill jar


Wash, cut, and groom apples, though peeling is not necessary. Fill a layer or two on the bottom of your glass gallon container with apples. Pour in cooled water/honey mixture. Add 2 Tbsp. of lemon concentrate (we used certified organic), one package of champagne yeast, and fill up the remainder of your container almost to the top with water. Leave some amount at the top for bubbling, or it will overflow. Cover with a clean, not too thick cloth, and tighten with a rubber band.

Stir every day. After about a week or two, the bubbling will appear to be gone. Filter into another glass container that you can stopper with an airlock. Let sit for another month, checking the bubbling occasionally. When it's down to about one bubble a minute, bottle it by siphoning the brew out of it's container until just before it hits the crud on the bottom. If you choose not to sparkle it, it will have no grouts on the bottom of the bottles, and you can drink as is, without concerning yourself with the type of jars you need. Masons will do, though not terribly classy...

If you wish your mead to be sparkling, like we did, it's only slightly more complicated. Adding more honey water or sugar water stimulates the yeast back into action, and creates more bubbling. As it does so, just like homebrewed beer, it will generate more grouts on the bottom of the bottle, so be careful when pouring it out. Only use bottles designed to handle the pressure, like beer or pop bottles, and make sure you do your calculations right, or your bottles may explode! Carbonation drops take out the guesswork of making up a sugar water addition, but they are highly processed sugary drops. I didn't want a water dilution, so we opted for those.

Because honey is harder for the yeast to digest than sugar, it does take far longer for mead to brew than beer or wine.  We suspect that without nutrient or fruit added, ancient mead makers may have just put it in a barrel or pot and forgotten about it for a year or so.  We just opened one of the bottles from the batch we started in September, and it only just began to get bubbly!  But it was sooo amazingly good... So be patient with your mead, and to keep yourself from cracking it open, try a new recipe in your gallon jar almost as soon as you bottle up the last one.  This time we have apples and fresh ginger!  It already smell like ambrosia...

Even after it's done, remember:  the longer you leave your mead to sit in the secondary fermentor with the air lock, or in the bottles, the better it will taste!  So by all means drink as much as you can for the holidays, but save a bottle or two for Imbolc or Midsummer.  As one of the mead makers for your gatherings, you will always be one of the popular guests! 

I find it even easier to brew mead than beer.  Even for those who haven't tried making home brewed beer or wine yet, mead is truly inspiring beverage that has loosened the tongues of Gods, and giving the bardic gift to mortals for centuries.  Lift up your glasses!  Got Yul!