Showing posts with label organic. Show all posts

Tuesday, March 19, 2013

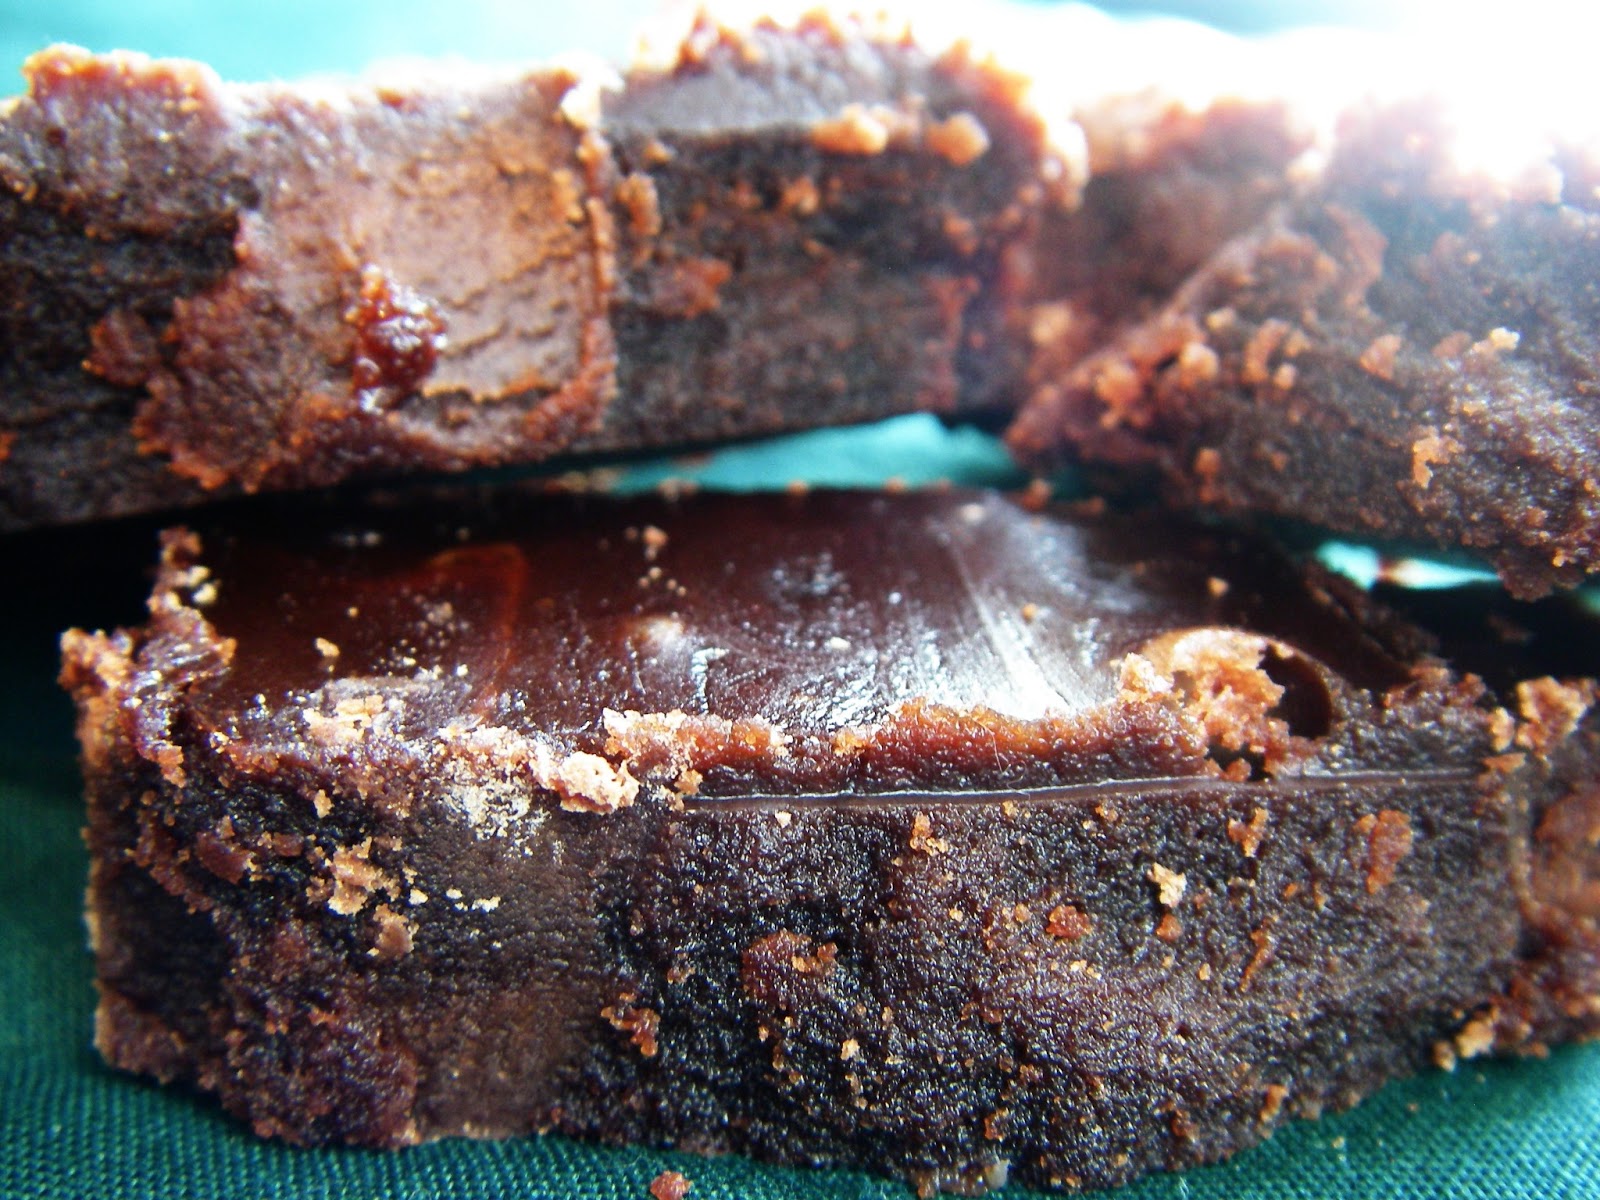
Vegan Fudge: Traditional Homemade Candy - A Step by Step Photo Guide

A truly vegan guilt free fudge, made with organic and Fair trade ingredients!

I don't make nearly enough fudge for the family and for gifts.  I made it so much for the shop that it became a bit of a chore.  But lately, I've been trying to create a habit of whipping some up for special occasions and holidays like Yule gift giving. For Lupercalia last, I poured a batch for my daughter's class in lieu of the more grown-up celebrations.

Actual fudge isn't the bizarre current fashion of brittle pre-cut oversweet crumbles or "instant" recipes of marshmallow cream or melted chocolate chips. Though those are now considered the norm, they are modern and rather inadequate adaptations of the traditional candy, which requires some skill to make.  It's uncommon now to find someone who practices the techniques, other than London High Street candymakers, so until they try the fudge from the StillRoom, most people haven't ever eaten it.

Traditional fudge is a real candy; cracked sucrose heated to a certain temperature.  Since it requires some specialization, as well as access to sugar, this is a relatively modern confection, originally only available to the upper class in the middle ages and working its way down to the rest of us when sugar and high heat cooking became more available.  Although the traditional method takes far more time and care than current industrial techniques, the final result, being much healthier and eco-friendly, is totally worth the effort to learn. People will be impressed that someone still knows how to do this!

I always go to the horse's mouth for my research. Whether it's Roman naturalism treatises or early medieval physician documentations (those I have to get in translation still), to late medieval stillroom books and Victorian household encyclopaedia  I look for the original techniques and uses before I try adapting something.  In the case of fudge and candy making, they were an encouraged art for amateur cooks and a requirement for professionals up until the 70's.  So to get ideas about how to re-create them for today's audience, but still keep the best of the traditions, I refer to cookbooks and instructions from the 60's all the way back to the Tudor era.  In this post, I'll take out most of the guesswork and distil down the best of the techniques for you.  As it were..

Candy making is one of the most dangerous ventures in your kitchen.  Fudge isn't as bad as some, but candy is a thick burning syrup that sticks to your skin and clothing, and doesn't come off easily.  Think Napalm.  When you attempt any candymaking, make sure the kids are busy, the pets aren't underfoot, and no one is running around your workspace.  It is unforgiving, and there are few second chances.  If you get it on your skin, have some comfrey, tea tree, aloe or lemon juice ready.  Only the comfrey will ensure you have no scars, but the others will help you use that hand again in less than a month..  (Experiences of the Candy Maker story no. 1)

1. The Pot


Your choice of pot is pretty crucial.  It has to be nearly three times bigger than the amount of ingredients you first put in it, and it has to be comfortable handling very high heat for a fairly long period. So for a pound of fudge for example, I use a Dutch oven.  If you select too small a pot, you won't be able to correct your choice easily once you get started, since you do not want to attempt to pour splashing candy from one pot to another, and the only alternative is letting it bubble all over your stove.  (Experiences of the Candy Maker story no. 2)

The sides of your pot need to be coated in a fat. Don't worry about the bottom. I used to use butter, but it's not necessary.  The vegan version works just fine with vegetable shortening, cocoa butter, or coconut oil.

2. The Ingredients


For 1/2 lb of fudge:

2 cups sucrose (dehydrated sugar cane juice is what I use.  It's a whole food, and works the same as white sugar. Beet root sugar theoretically will also work.)

1/3-1/2 cup cocoa (I use fair trade organic cocoa, which is much stronger than regular, so compensate accordingly if you don't have any.)

pinch salt (artisan sea salt means I use much less, and it's good for you.)

2/3 cup water (I use filtered.  I can easily taste chlorine, and it can create weird reactions in cookery.)

Try not to get the sugar on the sides if you can.  It will make your job slightly harder later.

3. The Cooking


Stir on the stove while heating.  It will take awhile to combine properly, and continue to mix and stir until it starts boiling. Don't worry too much about the clumps of cocoa, but do be careful not to get sugar on the side.  If you do, scrape it off with your spoon or even a rubber spatula, if you're fussy...  It will start to get very satiny before it starts to bubble.

Then stop, and take the spoon out.  Set your spoon aside and let the candy bubble.

See how big it gets?
Get out your candy thermometer, and place it in the candy, without touching the bottom of the pot.  For fudge, you require the Soft Ball stage, or 235-245F. (about 112 - 118C for most of the world). Check the reading by getting down and looking at eye level.  A few degrees can make all the difference in candy making.

I usually stop at 240F and, depending on the pot I use, it will rise a bit before it starts cooling. I also use  the highest heat setting, but you may want to turn it down as it approaches the correct temp, since it can rise quickly.

My home ec teacher was a true professional, and I remember at least one experiment with candy making where we didn't even use the thermometer, but instead used the ice cold water method, so we learned how each candy stage 'felt'.  For stillroom work, I use the far easier temperature gauge, which is what I recommend here.

Turn off the heat and just let it sit without movingIt will fall quickly.

Get your pan ready.  If I'm shipping or giving the fudge away, I use a disposable or reused tin.  If we're keeping it for home, a cake or pie pan will do. After washing, make sure the pan and lid are thoroughly dry.  Any water droplets can mar the surface look of the fudge. Grease bottom and sides.

Now find something else to do with yourself for a bit.  I try not to leave the kitchen or watch TV, in case I forget what I'm doing, but your fudge needs to remain undisturbed while it cools.  You can leave the thermometer in if you like.  You are waiting until the temp is about 110F, or 45C.  I just use my hands near the bottom of the pot. If it's uncomfortably hot to the touch, it isn't ready yet. Wait until it's still quite warm, but not too long!

4. The Beating


Now comes the trickiest and fussiest part.

Testing, testing...
Using a new, clean, dry spoon, add your flavouring.  I often use the traditional 1/2 tsp. vanilla (organic and fair trade feels good and tastes better, so you use less.)   Mix in and begin to beat the fudge.  Depending on how hot it was, this can take a while. Watch carefully under a good light source. Keep beating until you begin to see the gloss start to disappear with each stroke, and the fudge become heavier and thicker.  Pour into your pan.  Many do not recommend scraping the sides into your pan.  I only suggest it after you have filled your pan, and you want to eat - I mean, test - your batch.  If I am giving it away, I don't want to take a chunk out to test it, which would totally mar the look, so I use the remainder that is scraped on to the spoon.  Mmmm...testing...

(Illustration from Better Homes and Gardens: circa 1966.) 
For home use, score the fudge while it's still warm, to facilitate cutting it later. When I present my handcrafted fudge in the traditional manner for shipping and gift giving, it is sealed when cool, unscored and untouched, until opened by the recipient. Stays softer that way, too, and doesn't get all broken up in transport.

After completely cooling, your fudge should be soft, moist, even grained, and satiny.  If it's not entirely perfect, and isn't completely far gone, a good freezing will fix most errors. Freeze completely, and when it's totally thawed out again, its structure changes to a better grain.  Only freeze once, though, and don't refrigerate after. It turns into a pudding.

Is that a dinosaur print in my fudge? No, that's a kitten track.
Remember to cover your fudge when cooling!
Fudge is a tricky and fickle candy, so occasional sloshes on the side or drops of water can ruin its perfect surface, but fortunately my skill makes such incidents rare.  So you'll need to practice!

5. Variations on a Theme


Herbs


Remember when your food was your medicine and your medicine your food?

From horehound candies to spruce beer; from real marshmallow to liquorice, Western herbalists have traditionally created tasty treats to tempt those under their care to take the vitamins, minerals, and remedies they needed. In the spirit of that ancient protocol, I often add medicinal or nutritive value to my fudge with herbs, or vary the flavours with different additions. Because it's just not magnificent enough already...

Substituting the water with an herbal infusion of organic herbs means the sky's the limit.  Cool and filter with cheesecloth first, of course.  Even one stray leaf will be most unpleasant in a soft, moist, even grained fudge, if it doesn't ruin it completely. I've never found an herb that noticeably affects the flavour of the fudge, so consider what effects you're interested in, rather than worrying about blending the flavours.  Don't forget to use a non-reactive pot for cooking your fudge, too, if you want the herbs to be at their best. Some suggestions are:

*Nettle and Dandelion leaf, which has oodles of vitamins and minerals, including iron, and helps prevent allergic histamine reactions. Forget to take your calcium? Can't stand your iron supplement? Need more B's? This will make you look forward to your daily dose.

*Wild yam, Dong Quai, Vitex, Cohoshes, Cramp Bark, and Licorice Root can make a PMS or Menopause fudge to replace and replenish your hormones.  Who needs Midol?  I have fudge!

*Immune Boosting - Elderberries, Echinacea p. and a., Astragalus, Ginseng, there are so many...  I mean, if your kids are gonna eat 'em anyway..

*Ginseng, Sarsaparilla, Yohimbe, and Damiana can add spark to any adult encounter.  Seriously.  Use this one sparingly.  It totally works..

Flavours


Like it extra chocolatey?  I know I do, so I often double the cocoa powder.

Feel like a mocha? Add expresso as part of your water component.

Organic oils are much stronger than flavoured oils, with no aftertaste.  They are added just before the beating, instead of vanilla. We have experimented with many in the stillroom.  Some of our usuals are:

*Peppermint: Careful.  Organic peppermint is very powerful.  A few drops are all that's needed.
*Sweet Orange.
*Rum
*Brandy
*Lavender. Traditional, believe it or not.

Tips


Candy making is pretty impressive organic chemistry.  You are changing the molecular structure of the sugar, so certain conditions must be met, or it just won't work.  Sugar stops melting at boiling, so make sure all of it is mixed and off the the sides of the pot before it starts to boil, since those grains won't be able to melt after that.  Why is that important?  Because, like honey and syrup, liquid sugar will accrete around any stray particle, especially unmelted sugar, and crystallize completely.  Once that happens, there is almost nothing you can do to save your candy.  It will be inedibley grainy, and even freezing won't fix it.  That's why you need a new spoon to beat with, too.

I therefore air dry, rather than towel dry, all of my equipment where possible, just to be extra cautious of stray particles.

Beating also alters the candy.  The longer you leave it to cool, the quicker it will turn when you begin to beat. If you start too early  it will take forever, but don't wait too long, or the entire thing will set in your pot in a flash.  If you pour before the candy has altered enough, it will be grainy, but usually edible.  Freezing will help that mistake the most.

It's easy to double batch, but triple gets harder.  You need an extra big pot, and strong arms to beat that much candy.  Don't say I didn't warn you...

Not the industrial brittle pre-cut candy most people are used to; this is the most moist and creamiest fudge you've ever tasted, and absolutely guilt free chocolate!  Let me know how your experiments go, and good candy to you!

Monday, December 24, 2012

Ginger Beer / Ale Recipe: Traditional Yule Recipe - Flashbrewing

Medieval woodcut of brewhouse

We didn't have quite enough handmade goodies this year for Yule, so I felt it was necessary to whip something up.  I had a bunch of fresh, organic ginger from EGS that I couldn't use all up before it dried out, which inspired me to toss together a quick batch of ginger beer for the season.  I'm familiar with the theory, but I never gave a it a try before.

Ginger slices, lemon juice, and sugar in a jug,
with enough water to fill it up mostly to the top.
In the time my journeywoman took to finish one of her tasks, I had completed the entire initial setup. I cleaned and sanitized the one gallon jug for my experiment, cut up about 1/4 cup of ginger in slices that can fit easily into the jug's mouth, and I added the lemon juice, sugar and water. I know it's common to boil the water and sugar to help reduce wild yeast, but all I had available was bread yeast anyway, so it didn't really matter if I got a few weirdo flavours in, too. By leaving out the step of boiling and cooling the syrup, it completely reduces the prep time and makes this a snap!


Bung in the top. If you don't have one,
cloth with a rubber band around it will do.
It's largely to help it bubble without
getting foreign material in the mixture.


Four days later, I filtered out the ginger and left the grouts on the bottom.  There were surprisingly fewer than usual with beer, but the result is still really cloudy.  It stands to reason, because bread yeast doesn't flocculate as much as beer or ale yeast, so there are fewer byproducts that fall out, and more then stay in suspension.


A funnel with cheesecloth in the spout
recovers the most liquid, but takes longer.


Or you can use the cheesecloth filter over a sieve, which is much quicker, if a bit messier...

I used a pop bottle since it can handle pressure. I only did one, and left the rest in the jug, just in case this part didn't work out as well as I hoped. I wanted it quickly, so the bottle can be the secondary fermenter almost immediately.  I should have waited, though.  It was carbonated almost the next day, and I had to keep releasing the pressure to keep it from exploding. (Fortunately, the pop bottles have alot of give.)

By the time Solstice and my guests arrived, we were able to drink fresh ginger beer 8 days after it was first brewed.  It has slightly too many sugary notes and not quite enough ginger zing, but that has of course improved with age.  It is now 11 days since I first threw the batch together, and all the sugar notes are gone, with a fine zip of ginger.  There is a slight yeast note, but only in the nose, which my husband, Tuckamoredew, prefers in a beer anyway. The colour continues to be lovely, and very homemade, but it hasn't clarified any further.

All in all, it was a glorious experiment, rated highly successful by all who imbibed.  It was largely gone by Solstice, but I saved enough of it to continue to ferment and carbonize in the bottle.  For my next batch, I won't actually bottle until a day or two before serving.  In the first week or so, that seems more than long enough for a good fizzle. I served it without chilling.  Maybe I'll try it next time ice cold and frosty!

Here's the recipe I used:

1/4 cup fresh organic ginger, sliced
1 tablespoon organic lemon concentrate (juice of one lemon will do)
2 cups organic sugar
1 tablespoon quick rising bread yeast
enough filtered water to mostly fill to top

Let sit between 1-7 days. Filter. Serve in 1-2 weeks. Bottle a day or two before serving if carbonation is desired.


Flashbrewed carbonated ginger beer, in a Kölsch glass.

The lemon is partly for flavour, and partly for nutrient for the yeast.  Though there was almost no bubbling over, like there is in beer and ale making, I still left some air in the top for it when I poured in the water.  I'll leave less next time.  When everything is in, put on the cap of the jug and shake by inversion a few times, just to get the sugar all dissolved.  I did that a few times every day or so for the first few days, just to be on the safe side, but then I left it alone so it could grout up. Bung it or cheesecloth the top, and let it sit. I put it by the register to keep it warm, but not too toasty. I filtered it after 4 days, but I could have left it a bit longer.  It seems to be perfect by 2 weeks, and I had no desire to add more sugar to ferment after it had used up all the yeast, since I let it do so in pop bottle instead. No extra sugar!

Enjoy!

Monday, November 19, 2012

Washing Grains: Traditional Soapless Cleanser for all skin types


Another great traditional cosmetic found in almost every ancient beauty book from around the world.  From azuki beans to almonds to rice bran, ingredients usually feature local products, but most have at least a few exotics in them, for both medicinal purposes and to lend a sense of elegance and luxury.  Naturally soapless, they cleanse the skin of oils and impurities, as well as exfoliate and smooth the surface without harm.  If the herbs are chosen with health conditions in mind, they can even out tone, soften lines and wrinkles, and help cure everything from psoriasis and eczema to blemishes!

I made this originally for myself, as I couldn't find any on the market made with quality ingredients as well as reasonably priced, and it is now my most popular product. You'll see these in boutiques and spas for four times the amount, but they all used to be made at home. I find that, used daily, the healing herbs and exfoliation can appear to take 5-10 years off my face in about two weeks. They work like magic!  They are also a welcome and thoughtful handmade gift, and an essential for a home spa day.

My version of washing grains are based on years of experimentation on ancient formulations with modern sensibilities in mind. I use only organic ingredients where possible, including the essential oils, so this cleanser has the least chance of reaction for even the most sensitive skin. I designed this product to work with any other regime and for everyday use. It contains no nut products, which have allergy issues, and can spoil if not used directly. These will keep almost indefinitely, though using herbs as soon as possible is always best. I grind them at the lowest temperature as possible so as not to decrease the efficacy of the delicate herbs and oils.  I use newly dried herbs, since using fresh will mean that you must use them within one or two days, and it will already be a paste.  Rather like a facial pesto, it is also traditional, of course, but requires a bit more fussiness. Feel free to give it a try!

They can also be used as a mud masks - once or twice a week is recommended. Water, honey and yogurt can be used as a base with the Grains. Honey is antibacterial and is especially recommended for problem skin. For a slight natural bleaching effect for freckles and blemishes, the Acidophilus in yogurt increases the efficacy of the elderflower.

If you've never used Grains before, I recommend starting off in the bath or shower, as they can be tricky to rinse off completely in a sink. Now I know why previous generations needed a basin on their vanities: to splash off Washing Grains!


My typical batch can include:


Oatmeal : For softening, exfoliating, and relieves irritations.
Cornmeal: Exfoliating. Considered sacred by peoples of the Americas.
Kelp: Exfoliating. High in vitamins and minerals.
Clay: Used to draw out toxins and other impurities from the skin while providing minerals.
Fennel: Wrinkle remover. Fragrance herb.
White Willow: Moisturizing. Healing wash for eruptions and sores.
Nettle. Astringent, tonic, improves skin. Very high in vitamins and minerals.
Lavender flowers: Soothing. Stimulates circulation. Toning. Anti-microbial and topical antiseptic. Healing for cuts, burns. Fragrance.
Rose petals: Wrinkle removing, moisturizing. Fragrance. Sacred in Western Europe.
Linden: Softening, healing. Wrinkle removing, antiseptic, mildly bleaching. Fragrance.
St. John's Wort: Anti-microbial. Healing for skin ulcerations and severe conditions.
Red Clover: Skin conditions of all types. Purifier. Blood cleanser.
Yarrow: Astringent and healing, especially for cuts and gashes.
Elderflowers: Tonic. Clears and softens skin, smoothes wrinkles and bleaches freckles.
Calendula: Treats inflammation, wounds, irritations, and sores.
Chaparral: Treats severe skin conditions, including serious infections.


Add only a small amount of the essential oil of your choice into the mix, or whisk in at the end for different batches.  Any more than a drop or two, and you risk it becoming a bit more tingly than you might be comfortable with, as well as creating a rather lumpy mixture.  Many essential oils have medicinal as well as perfumery properties, so keep in mind the effect you want.  Don't use fragrance oils. They have no medicinal properties, can clog your skin, and are usually entirely a chemical creation.

Use the bases in greater ratio than the herbs.  You don't actually need many herbs, and they can be rather stick-like.  Grind everything to a fine powder in a coffee grinder, wheat mill, or blender specifically set aside for this purpose.  Take a break if it's gets too hot. You wouldn't want to ruin all the best parts of the ingredients. Experiment with the ratios to get the effect you want.  Don't be afraid to try some of the traditional formulations with different beans and nuts.  Some of those are much harder, though, and may require a hammer to get down to a reasonable size before grinding, which is another reason I don't use them.  It's too much wear and tear on my equipment, since I make so much of these... Each nut and bean has different effects and properties, but remember to keep those types in the fridge to minimize degradation.  And keep track of your recipes!  You may hit upon the next, greatest version, and we'll all want to know about it...
 

Monday, November 12, 2012

Four Thieves Vinegar: Non-toxic & Natural Disinfectant & Cleanser


From what evidence we have, infused vinegars have existed almost since we first discovered vinegar.  It's so useful by itself, and infusing it increases its effectiveness and potency.  Its many functions include:


- culinary

- preservation
- beauty regimes
- cleansing
- disinfection
- anti-infestation

I have gone into detail on some of the cosmetic vinegar infusions in this post.  Now would be the time to start making them for the holidays, if you were considering giving them as gifts, by the way...


Herbally infused vinegars are natural, organic, non-toxic, inexpensive, traditional technology that used to and still can replace so many of our modern products.  They can be full strength for cleaning and disinfecting, as an insect discouragement or anti-fungal. With the proper ingredients, they are remarkably effective against bacteria, as well as an efficient cleanser which leaves a refreshing scent. I personally have used the diluted spray to cure my apple trees of a debilitating fungus that had been plaguing them for years. I also got rid of the aphids on my Virginia Creeper and created a scent barrier against ants getting into my house.


Diluted, often with rosewater, it was used as a cosmetic, to tone the face, clear up eruptions, refresh clothing, and in a sponge nosegay, was kept near the face to ward off the Plague. Certain physicians are still called quacks due to the medieval practice of wearing a duck-like mask with a sponge of aromatic vinegar resting in the beak when visiting areas of contagion. Perhaps it's currently an insult to call a doctor a quack because it implies their techniques are right out of the Middle Ages.


It should be used only with extreme caution during pregnancy, as some of the herbs are abortifacient. I used it when I was pregnant with my son to no ill effects, but I took care not to get any on my skin.


Four Thieves Oil is a very modern invention, and not the same thing at all.  It usually contains essential oils of similar herbs, but oils and aqueous infusions do not often share the same properties.  It cannot be used for all the same purposes as the vinegar formulations, and are often far more expensive.  Though it apparently can be used for similar magical purposes, such as banishment, in Vodun and other systems...


The first actual record we have for the version known as Four Thieves is not medieval. If it is indeed an actual record. Most of the "documentation" are really stories. I will take the liberty to re-post this excellent history.  (I'd credit it if I knew the original source, but this exact version is all over the 'net.):

The famous French aromatherapy doctor, Jean Valnet, has two recipes in his book. He claims the original recipe was revealed by corpse robbers who were caught red-handed in the area around Toulouse in 1628-1631. His story is the more credible of the many one can find. Given the virulence and deadliness of the plague, the judges were astonished by the indifference of the thieves to contagion. Valnet quotes the archives of the Parliament of Toulouse:
During the Great Plague, four robbers were convicted of going to the houses of plague victims, strangling them in their beds and then looting their dwellings. For this, they were condemned to be burned at the stake, and in order to have their sentence mitigated, they revealed their secret preservative, after which they were hanged.
Given the source, I choose to believe the Valnet account, but there have obviously been many spins of the tale. Here is the recipe stated to be the original:
  Original Recipe for Four Thieves Formula
3 pints white wine vinegar
handful wormwood
handful meadowsweet
handful juniper berries
handful wild marjoram
handful sage
50 cloves
2 oz. elecampane root
2 oz. angelica
2 oz. rosemary
2 oz. horehound
3 g camphor
Dr. Valnet has a variation of his own described as an antiseptic vinegar:
Marseilles Vinegar or Four Thieves Vinegar
40 g. greater wormwood, Artemesia absinthum
40 g. lesser wormwood, Artemesia pontica
40 g. rosemary
40 g. sage
40 g. mint
40 g. rue
40 g. lavender
5 g. calamus
5 g. cinnamon
5 g. clove
5 g. nutmeg
5 g. garlic
10 g. camphor (do not use synthetic camphor)
40 g. crystallized acetic acid
2500 g. white vinegar
Instructions: steep the plants in the vinegar for 10 days. Force through a sieve. Add the camphor dissolved in the acetic acid, filter.
Valnet says his formula is useful in the prevention of infectious diseases. He says to rub it on the face and hands and burn it in the room. It can also be kept in small bottles that are carried on the person so that the vapors can be inhaled.

Years of experimentation using historical and modern recipes have helped create my interpretation of this legendary liquid. My version is an amalgam of several different recipes, taking into account what was commonly available, especially in England, during the medieval period, and what was in my garden fresh.  It is a concoction of white wine vinegar steeped in aromatic and anti-bacterial herbs such as garlic, rue, and wormwood for a number of days, then filtered and used in dilution with water for cleansing the house and other areas.


Remember:  Only use real, brewed vinegar for all these recipes. Ordinary store bought white vinegar is just lab-created Acetic Acid diluted to 5%.It doesn't have the same richness of composition or balance of acids as real brewed vinegar, or the same sustainability. Try these recipes with other base vinegars, too, such as apple cider and rice wine! 


Here is my exact recipe, for those that want to try it at home, or who just want to see how crazy I get when I make these things.


My Four Thieves Vinegar Recipe:


Approximately the same sized twig piece of each:

fresh peppermint
fresh thyme
fresh rue
fresh rosemary
fresh wormwood
fresh sage

four cloves garlic (slightly crushed to release the allicin)
3 bay leaves
4 cloves
4 small pieces cinnamon bark

Place ingredients in old, clean, spaghetti jar. Fill remainder of jar with white wine vinegar, stir to get rid of bubbles, add lid, and place in sunlight, like windowsill. Herbs will lose colour after a few days. Then you filter and can add a bit more herbs for a really strong batch.

Filter out completely in a few weeks, bottle and label.


Article published on Witchvox on December 30, 2012.

Thursday, October 6, 2011

Organic in Edmonton: Cheap! Readily Available Local Food Sources & Natural Cleaners


One of the local stores I count on for retail supplies.

I am often asked how we can afford to eat so organically on about $50 per person per week, or $800 a month for a family of four.  (With purchased lunches and the occasional pizza delivery, it's a bit closer to $1000, but those do add up...)  As a Global Peasant, it is not only possible, but we eat like kings!  As it were..

Though the list of suppliers and individual foods in the second half of this post was written specifically with Edmonton in mind, there are many immediate actions you can do every day to increase the quality and nutrition of your food, while still lowering the cost. I go into just a few here.

Pre-prepared foods are of course the most expensive with all their value added.  If you have little time during the week, learning how to prepare meals yourself to store for later consumption will save you up to half your food budget, depending on how much you rely on them.  So most of the items suggested here will be fresh, frozen, canned or prepared organic food that you can use as ingredients in meals to store for the rest of the week.

For a refresher course on what third party organically certified means, what you should be looking for, and why, see my blog post on the subject.

Don't forget:  In Europe, and many other places in the world, food shopping is done throughout the week, not twice a month for a $500 bill.  More frequent, less expensive, small bundle shopping means that you can take your bike or walk, rather than stuff your car to bursting.  It also means that you can get fresher food more often, instead of prepared foods that can survive a month's storage.  Shopping more often can lead to a smaller food bill, fresher food, and more exercise.  It's really worth changing habits for, and far more in the spirit of the Global Peasant.

You may notice a lack of candies, desserts, snacks, prepared meals, organic and fair trade teas, or spices in my listings here.  That's not because we don't use them; it's because we make so many things in the Abbey StillRoom ourselves!  And often what we can't make, we order wholesale.  We are always expanding our operation, our sources, and what products we can order. Yes, we are always happy to include extra for others, and we are now have our own direct-to-home wholesale organic co-op.

You'll also notice a lack of meat and dairy products.  Peasants the world over have rarely eaten flesh, except for feast days.  Meat is expensive!  Even the cheap cuts. Which is only fair when a creature sacrifices its life and the lives of all its future descendants for your consumption.  It costs alot to raise those animals, you know, and after you kill them, they don't make any more.  So it's rather wasteful. You'll find that you can reduce your food budget sometimes by half if you limit or cut out your meat consumption.  And then when you do purchase it, you can afford to get the very best organically grown food for yourself and your family.  The animals lead better lives, and you don't get hormones and antibiotics, with the added bonus of a far superior flavour.  It will also help you appreciate it more.

Organic food does not in fact have to be more expensive. It is a myth perpetuated by some health food or whole food stores, and other kinds of grocers; sometimes to gouge their customers, sometimes to discourage or discredit organics, sometimes just because the people bringing them in don't know how to price grocery items. (Here's a hint: basic food stuffs shouldn't have the same markup as supplements and clothing.) For those of you who want to increase your organic consumption and help support the rise of organic foods, practices, and sustainability, as well as decrease your food spending, here are some ways to do it in Edmonton.

Old Strathcona and Downtown Farmer's Markets:

Only open on Saturdays from 8 AM to 3 PM, these are some of the largest gatherings for local and inexpensive food.  I don't feel like we have fresh food in the house if we don't go to visit them every week.  We are totally car-free, but we get our bikes, panniers, and trailers down there as a matter of course for our weekly food supply.  In winter, it's a bit more of a trial, but that's what backpacks are made for... From the lowly potato to free range meat and eggs to unusual eggplant, fresh honey and exotic mushrooms, fresh and local food abounds.  Not every vendor is organic, though, so do check.  (The hydroponic people aren't technically organic, since hydroponic can't be, but they are as close as you can get, and their produce is exquisite!) There really is a very palatable difference in farm fresh, grain fed, free range eggs from the ones in the supermarket.  Not only are they better for you, they are better for the chickens themselves.  So come early.  They sell out fast...

Save-On:

A division of Overwaitea Foods out of BC, they came naturally to the integrated organic scene early, and have many organic foods hidden amongst their conventional offerings.  Though each Save-on can order any of the items that any other does, it is a choice of the mangers to bring certain products in.  Soy sauce, organic chocolate, tinned organic tomato paste... Your best best is to check the bulk bins first.  I love the organic popcorn, cashews, and fair trade organic chocolate coated almonds.  Remember: prepared foods and treats are always more expensive, so purchase sparingly.  But be sure to look for the organic broccoli, tofu, and even organic tortellini, burritos, and rice cream in the frozen section.  Since each Save-on is different, check with your local store and ask to have your favourites included.  My local Save-on is the source of this current list. Save-on is one of the retailers that boosts the price on organic foodstuffs for no good reason that I can see, other than to perpetuate the myth that it has to cost more, or to discourage consumption.  I know this because I have a pretty good idea how much they are paying wholesale for those items, and there is no need for them to retail for that much, especially when small health food stores sell the exact same items for less.  So watch what you buy!  Spectrum oils, which I love, are about 25% more expensive at Save-on than Safeway, so don't do all your shopping in one place!  They draw you in with the great organic taco chips, salsa and snacks, but get you with the oil and soya sauce.

Safeway:

Again, my local Safeway is the one I source. Your mileage may vary in your neighbourhood. It still pisses me off, though.  The latest trend of Safeway is to create their own third party certified organic line, the "O" brand certified by QAI, which is comparable in price to conventional.  In some cases, cheaper! However, each Safeway manager still chooses what customers they want, and my local Safeway has decided that our neighbourhood doesn't want that uppity stuff, and they are slowly removing organic from my shelves.  So I have to complain to the national phone line again, soon...  Organic pasta, oils, and other staples are some of the cheapest in the city, but like Save-on, you have to watch the prices and select only those items that are worth it to get from this retailer.  They will often have fresh produce, but at my local Safeway, their "always fresh" guarantee doesn't apply to organic.  Rummaging through the piles of rotting food to get to the new ones at the bottom makes me feel like an organic raccoon.  I'm sure they are hoping that we all just go away...

Earth's General Store:

Since the demise of giant version of Organic Roots, this is the best place to get all of the items you couldn't find anywhere else.  He's expanded, and now has a much bigger store on the other side of Calgary Trail.  And so convenient!  You can see the store first thing as you come out of the bike trail in the Mill Creek Ravine!  His food staples tend to be on the pricey side, so we usually just get our treats there, but it's our main source of toiletries and cleaners, so we still visit at least once a month.  Be prepared to stay for the literature and community connections!  You'll go in for organic ginger but hang out for the sustainable housing lecture...

Polar Bear Health:

One of my other stops for vital toiletries and cleaners, Polar Bear offers all it's products, including sale items, for 10% off to members. They never gouge, even on their supplements. Not really large enough for everyday food and beverage (sigh), they have a good selection of cosmetics, soaps, and other necessities that, including the discount, are the cheapest retail in the city.  Start talking to the friendly, wise staff and you may never get out of there!  One of the few independent health food stores left in the city, they value and invest in knowledge, and are certainly worth the trip.

Italian Centre:

Limited selection, but they are bringing in more organic food locally and from Europe all the time, and it's the cheapest of its kind in the city.  Tomato paste and sauces, vinegars, olive and speciality oils, pastas, and many are gluten free!  Independently owned, they are far more responsive to order requests than more grocers, so let them know what you need.

Our Organic Shopping List:

To give you some idea of how this all works and how we can take such good care of our family on such little money, here's most of our organic staples, presented according to type, with sources in abbreviation, and general frequency.  I won't include the prices, unless they are off the top of my head, 'cause that seems like way too much like work.

Weekly:

potatoes - FM, EGS if we miss the FM that week
sweet peppers - FM, Safeway has them every few months but from Mexico.  I usually pass...
eggplant - FM.  I'm surprised how much a staple this has become.  I never used to like it, but we have at least one eggplant dish a week now.  No eggplant in the fridge makes me sad...
tofu - Safeway, Save-On. Safeway only has the organic in pressed, which isn't our preference.  Save-On often has the softer version.  If you can't find organic tofu, make do without.  Soybeans are notorious for GMO contamination, and there is much to indicate that even small amounts are hazardous to your health. Organic Roots used to have fresh, locally made organic tofu.  Sigh...
onions, green onions - FM, Safeway.  I need them for nearly everything I cook.
apple juice - Safeway, frozen at Save-On. We still dilute this for our 3yo, which is great, because he goes though alot of it...
garlic - Safeway, FM.  Fresh. Though they are rarely at the Market..
mushrooms - Downtown FM for exotics, Safeway for local button, white, portabella.  The mushroom guy downtown is my husband's new best friend...
carrots, broccoli, cauliflower, celery - Safeway, Save-On, FM in season.


Monthly necessities or indulgences:

organic, fair trade coffee - Safeway, Save-On, EGS.  It's everywhere these days, so there really is no excuse not to look for it.  There is almost no difference in price, but do watch out for greenwashing with less-than-credible labels like Rainforest Alliance.  EGS freshly roasts it own organic, fair trade coffee, so I occasionally splurge...
soya milk - Safeway.  So Nice is one of the only brands that is certified organic, and therefore GMO free, but there are others.  Yes, I do have organic soya milk lattes every morning, thank you, and at about 10% of the price at a coffee bar...
cane sugar - Safeway, Save-On, EGS.  Save-On carries the organic, fair trade from Cocoa Camino in the bulk bins and in bags, but if you must, Safeway has two organic brands, though not fair trade...  When organic, cane sugar is a whole food, so don't be shy with it!
olive oil - Safeway.  Save-On also carries Spectrum oils, my personal favourite, since they are organic and cold-pressed, but they are much more expensive there. Now that Safeway's O brand is comparable in price with conventional, I usually just get that one.
basmati and jasmine rice - Safeway, cheapest in the bulk bins at Save-On.  I still can't get into brown rice, but there is nothing to compete with the smell of organic rice. Like organic flour, organic rice needs more moisture to cook properly, so don't forget to compensate.  Lundberg's Nutru-Farmed used to be the best you could get at both those stores, but now the true certified organics are in.  However, my husband picked this one up instead of our usual Lundberg, and I admit that I have had a conversion.  Safeway's O brand is literally the best basmati I have ever worked with.  The. Best. Ever.  It's obviously a very specific species, with a nutty smell, and each grain just falls apart from all the others.  My cooking has gone to the next level with this one...
hot peppers - FM.  I just don't bother anywhere else.  They aren't fresh or local enough...
eggs - FM, Safeway, Save-On.  Organic, free range. My husband loves them, and tries to get to Strathcona as soon as he can to get them, since they sell out so fast.  I still use them very rarely in baking and cooking that I just can't substitute for, but they kind of ooge me out.
tamari/soya sauce - Save-on, EGS. If you can't find a real, traditional brewed tamari or soya sauce, Asian Family will do in a pinch.  Why they don't make it more prominent on the label is beyond me, but their Light and Dark Soya sauces are made with organic soybeans.
dried pasta - Safeway, Save-On, EGS, IC.  Almost the same price as conventional, and so easy to find.
cream - Save-On.  My husband has to have cream for his tea, and organic makes me feel so much better about it...
peanut butter - Safeway, Save-On.  They have organic brands, but all have sea salt added, which isn't to our taste.  I'm not too worried about GMO's with peanuts so we get the "natural" kinds, which are just ground peanuts.
spinach - Safeway, FM.  Fresh in baby spinach leaves and frozen in chopped form.  Great for so many dishes!
peas - Safeway, frozen.  Shelled.
ketchup - Safeway, Save-On.  The latter doesn't carry the Muir Glen anymore, which is the next best thing to homemade, but the other house brands will do, even if they are a bit sweet...
edemame - Safeway, frozen. Soy beans in their shells.  Steam without defrosting, and shell as you eat them similar to fresh peas. Mmm...
taco chips, salsa - Save-On. Their in-house brand or my favourite from Que Pasa (BC.) Corn, like soy, is particularly contaminated with GMO, so if you can't find certified organic corn snacks, go without.  The risk just isn't worth it.
sesame oil - Safeway. Unrefined, low heat, from Spectrum.
canned chickpeas, kidney, and other beans - Safeway, Save-on.  It's terribly lazy, but soaking beans overnight means that you have to cook them the next day, and I just don't plan well enough for that.  Even if you can find dried organic beans to soak...  These are all ready to go, and cook in minutes! 
bananas - Safeway.  Bananas are one of the Dirty Dozen: a fruit that is highly contaminated with pesticides and herbicides when conventionally grown, so we don't get them unless we can buy organic.  We will often pick them up if Safeway is carrying them when we pop by...
strawberries, grapes, apples - Safeway, Save-On.  Usually in much nastier shape than their conventional counterparts, they are still worth the effort to sort through for the value of the extra vits and minerals, not to mention not ingesting the undesirable chemicals..
cheese - Safeway.  Since there are ethical parameters for animals required in organic certifications, I feel better supporting organic cheese.  But I sometimes wish I didn't like it so much...
corn flakes, corn pops - Safeway.  Not really, of course. Those are Kellogg's brand names.  The organic versions from Nature's Path are much tastier, more nutritious, and don't give you the cuts on the top of your mouth.  We all fight over 'em...
chocolate - EGS, Save-On.  Fair trade, organic. Eatin' and bakin'.  My husband has standing orders to get it whenever he stops in places that carry it.  The baking chocolate I use to make vegan truffles.  When it lasts long enough...
cocoa - Save-On, EGS. Fair trade, organic. Cocoa Camino, naturally.  Remember that you will need less of this in your recipes than conventional cocoa, since it's much richer and stronger.
chocolate chips - Save-On, Safeway, EGS.  Cocoa Camino makes great fair trade, organic, dairy free chocolate chips, but if I can't get there, the organic ones from Safeway will do...
icing sugar, light / dark brown sugar - EGS, Save-On.  Fair trade, organic.  Cocoa Camino makes everything...
tomatoes - FM. Hydroponic.  Almost as cheap as wholesale.  The only limit is how much you can carry!
honey - FM. It's so cheap by the pound, we can cook with it!  And make mead! Many of the local apiaries will even fill up your old containers for a bit off the price.  Don't forget to put some into a smaller container for daily use, and remember that it crystallizes after awhile.  Just reheat in small batches and it melts back to liquid. 3 pounds is about $20.
popcorn - microwave bags at Safeway, bulk bins at Save-On.  I prefer the loose in bulk bins, of course, for my old fashioned hot air popper.  It's so cheap!  You'll get used to making it every night again. Get lots.
tomato paste, tomato sauce, canned chopped tomatoes- Save-On, IC.  I'm making lots of my own pasta sauces now, and the cans make it much more convenient.  But I still buy pre-made pasta sauce in jars, in case I'm really short on time.  And I can re-use the jars...
pasta sauce - Safeway, Save-On, IC.  Local Prairie Harvest is so tasty, and there is no place cheaper for it than the Italian Centre.  Just wish they'd carry more of these organic pastas again...
wheat flour - Safeway (Sunny Boy: unbleached and whole grain, from Alberta), FM.  Organic wheat flour, even white, needs more water than conventional in recipes, possibly due to the higher mineral and vitamin content, so keep that in mind when you use it.
grape juice - Safeway, frozen at Save-On.  It's so strong that we dilute it for everyone in the house.  Lasts a week.
lemon concentrate - Safeway, Save-On, EGS.  From Santa Cruz.  You can use less, since it's extra potent, but with none of that weird aftertaste..
ginger - EGS. Fresh.
oatmeal - Save-On bulk bins.  Regular and instant.  Cheap as dirt.  Cheaper, these days...
maple syrup - Safeway, Save-On, Strathcona FM.
balsamic vinegar - Safeway, IC.
fresh pasta - Strathcona FM. Not many organic selections, but still fresh and locally made.
chocolate syrup - EGS.  When I don't make it myself, this is very nice to have on hand.  One of my favourites from Santa Cruz.
pearl barley, lentils - Save-On bulk bins, PB
mung beans - PB.  For growing your own organic bean sprouts!


Infrequent or In-Season Purchases:

coconut - PB. Shredded, non-sulfured.
molasses, rice syrup - EGS
vanilla extract - EGS.  Fair trade, organic. Giant bottle for $24.
baking powder - Save-On. Also has no alum.
rice wine vinegar - EGS. Really what our Asian sauces was missing.  No substitute.
peas, corn, turnips - FM. Fresh, in shell or in husk.  Nothing like it.
waffles - Save-On. Frozen. When I don't make them to freeze myself, we'll occasionally treat ourselves to these ones. But not too often, because of the gougy retail price. Again, from Nature's Path.
crackers - Save-On. My kids still love those things, and although the price is too high for where they are selling them, I will still pick them up sometimes.
cashews - Save-On bulk bins. Roasted or non-, whole or in pieces.  Still too pricey, but my husband loves them, especially in mushroom dishes.
licorice - Save-On, PB. Sticks or pieces.  The best licorice candy you will ever put in your mouth. Ever. I need to learn how to make it this good, but until I do, I'll just have to lust after Panda...
yogurt - Safeway. Nearly all store bought yogurt is just a tasty pudding, and doesn't you any good at all.  Organic contains live bacterial cultures, so I can use it for leavening, esp. in naan.
sour cream - Safeway, Save-On. Since organic has ethical standards for animal treatment, it's worth the few extra pennies to help them out, while also not consuming antibiotics and hormones...
sesame butter - Save-On, EGS. Main ingredient for tahini sauce, can also usually be used just like peanut butter for those with peanut allergies, and very high in calcium!
Patel's Indian prepared pouches - Save-on.  I admit it.  This is one of the only prepared meals I indulge in, but I really have to stop myself buying as many or as often as I want.  Microwavable in 2 min, stove for 3-5. No refrigeration needed. Even their conventional versions just contain... food.  Real spices.  No soyabean oil. No preservatives.  And tastes better than most restaurants!  Prepared foods always cost more than we think, though, so you'll have to exert some discipline to keep them only for emergencies, or you'll be tempted to live on them.  I use them when guests come over and I don't have time to make more than a few dishes, or with some pita bread after a hard day and I can't cook, or traveling and can't find food easily...  Things like that.  Mmmmm.... I know you`re looking at me, Channa Masala. Oh, yes you are...


Natural Cleaners, Toiletries:

Toilet paper - Safeway, Save-on.  Save-on has it's own brand of recycled, unbleached, and Safeway carries two.  Woohoo!  Unless it says recycled, it's not. It's virgin wood cut down just for fibre just to make paper products like your TP.  There is absolutely no excuse for not using recycled paper, and you can't possibly bitch about forest destruction if you use anything else.  Since you are wiping your ass with virgin rainforest...
Borax - Safeway, EGS. I can't clean if there isn't any borax in the house.  It disinfects with very hot water as well as bleach, without the nastiness; it softens water for whiter laundry, deodorises, and kills any bugs or eggs like fleas, tics, bedbugs, and there is no better scratchless cleanser for tubs, porcelain and chrome.  I use it in my handwashing to disinfect my wood utensils. Only dissolves in warm or hot water, so don't use it in your cold wash!
White wine vinegar - Handy Bakery, Superstore. Not organic. I don't encourage the use of the lab-created vinegars for so many reasons, so even in cleaning, I'll use only the real brewed vinegars.  Less harsh, too.
Hydrogen peroxide - PB. Not the woosy, expensive, small version you get at pharmacies, this industrial strength version (over 30%) is lab quality.  It will kill just about anything, and bubble like mad doing it.  And the bugs don't build up a resistance, either!  It's so much fun!  I put it in my delicate laundry to disinfect and deodorize, I dilute it and add it to the orange cleanser to make a truly fine cleaning cocktail that disinfects, degreases, whitens, and is completely non-toxic.  Don't let that fool you into complacency, though.  Strong H202 will eat through your skin, so always dilute, wear gloves, and rinse or wipe the surface thoroughly after cleaning.  Left-over residue can be potent enough to irritate the skin.
orange cleaner - EGS, though some Save-Ons might still have it.  It's concentrated, so it will last you awhile.  Cleans and smells great, with no fumes or allergens.  Doesn't smell like orange: it IS orange, made from the rind.  I wouldn't recommend eating it, though...
Big jug of Dr. Bronner's liquid soap - PB, refillable at EGS.  Organic, all natural, biodegradable. You can dilute it for hand soap, making it anti-bac with the addition of a small amount of GSE, you can use it for shaving soap or laundry or washing floors in a pinch...  It's highly recommended for your delicates, wools and silks!  Exactly the same stuff as those "speciality" soaps, only less toxic. It's an all in one cleaner, and buying the big jug means I don't purchase soap for about six months. ~ $70 for the largest jug.  Smaller quantities are much less and can last months.
GSE - PB.  Organic grapefruit seed extract.  Anti-bac, anti-viral, anti-fungal, preservative. Highly concentrated, it has some advantages over tea tree oil.  I use it in my liquid hand soap mix for disinfecting as well as keeping it available for pimples, boils, and other hard-to-cure skin conditions.
Shampoo, conditioner - EGS, PB.  I can't make either of those myself yet, so I still just pick them up.  Avalon is my current favourite, despite the smear campaign that USDA Organic tried to create about their organic certification.
oral hygiene products - PB, EGS.  Fluoride free, sugar free, SLS free toothpaste; natural bristle, biodegradable, or changeable head toothbrushes...  There are far more choices available to you than the same boxes, different names you see at your pharmacy...
Laundry detergent, dishwasher powder, dish soap - EGS, Vitamin Farm downtown in an emergency. All from Biovert (Quebec) or Ecover.  They clean better than all conventional chemical products I've tried, and they are both biodegradable, sustainably made, non-toxic, hypo-allergenic, phosphate-free, and mostly organic.  The Seventh Generation and NatureClean versions I won't use now even when I'm desperate.  They just don't work very well.
toilet cleaner, BBQ cleaner - EGS.  The first goes without saying.  The second works great on baked-on carbon and grease on stoves, without the fumes or toxins.  For those, I will use the NatureClean versions, but only because I haven't been able to find another brand locally.


This is not even close to everything that's available in Edmonton, since it's just our family's usual organic purchases, but it does give you some idea of how you can fit your personal preferences into the inexpensive, organic life.  If you're still not sure, or if you're really keen and want to save more on your budget while eating better than you ever have before, we offer very reasonable classes on the subject, or the slightly more expensive one-on-one personal expertise, helping you relearn how to shop the organic and healthy way.  It will save you so much money in long run, you'll wonder what to do with it all.  Or why you ever spent that much on that other stuff in the first place...

Saturday, August 27, 2011

ECOS Demo at the U of A - Aug. 13, 2011


"Interested in learning about native Albertan plant species? Want to know what ECOS' Naturalization Project is all about?

We'll have an informative talk about native Albertan plants by Cherry Dodd of the Edmonton Naturalization Group while we enjoy tea made from native plants and vegan pastry treats!

Following the tour by Cherry Dodd, we will be joined by Gifts Of Nature who will be doing demos on how to utilize native plants to create our own oils, salves etc."

For more information about ECOS' Naturalization Project

We donated our time so this event was free for the participants.


I have to practice recording these more.  We rode bike there, it was +30 out, and I didn't mike up.  So the sound sucks, and I'm roasting.  However, there might be some merit to these anyway.

Next time, I'm getting one of those clappers from the movie producers.  Any more like this and I'll have my nerd card revoked for low quality tech and content.

Part One


Part Two - After everyone has created their infusions


Tech and sound by my journeywoman.  She makes a better alchemist.  Heh.  But it was much appreciated, or I wouldn't have this at all.

When I was talking about olive oils, I oversimplified a bit.  Expeller pressed is squeezing.  Cold pressed is squeezing at low temps.

My 9 year old daughter said she had a hard time with the magpie cawing in the background. It's very...natural.  But if someone wanted to help me subtitle it in future, it might prove more useful.

Friday, June 24, 2011

Chinese Fried Rice - A Step by Step Photo Guide - Recipes: Organic & Vegetarian


I'm often asked what "you people" eat when the subject of diet comes up. Not that I usually bring it up myself, mainly because of questions like that...

Cookery is the homier dance partner of Still Room work and a vital component of what we teach. Most of our research and experiments in reClaiming appropriate technology focus on ancient and medieval European writings and practices. However, trying to reCreate the diet can be problematic. Most of the writings focus on specialty items, feast days, high caste foods and other unusual or rare dishes. Though the European settlers were mostly peasants, the current standard North American diet is no help, either in reCreating diets of the past or an evolution of the future. It's largely a corruption of the meat intensive "rich man's" food, coveted by the non-Native peasantry that ended up here, altered by poverty as well the traditional native foods found in their new home. It's high fat, high salt, low quality, limited variety, and mismatched combinations are one of the primary sources of illness in this culture. To be healthy and to encourage health, the cornerstone must be diet. Studies have shown that the best way to achieve that is proper knowledge and practice of cookery. Although we do attempt authentic medieval dishes, there are much more available traditional sources to draw upon in our day-to-day living. As part of the Global Peasant movement, we specialize in traditional peasant cuisine from around the world. Traditional peasant foods are tasty, incredibly inexpensive, and can usually have most ingredients locally sourced. They are traditionally organic and much more nutritious. Traditional foods from mature cuisines have also been time-tested sometimes for thousands of years with the correct and appropriate food pairings - combining the proper proteins, carbohydrates, and other best nutrition factors. In most parts of the world, peasants do not have access to large amounts of meat, as it is usually a higher caste or price item, and therefore most peasant cookery is intrinsically vegetarian. They usually require less cooking time or prep from limited fuel supplies, and so have less vitamin degradation than more longer cooking dishes. It has very little, if any, waste. Cooking as a Global Peasant is therefore one of the healthiest, cheapest, easiest, and most eco-friendly practices available.

I have been focusing on specific Chinese and Indian regions for the past few years. To ensure proper food combinations, I never mix cuisines in any one meal, unless it's a traditional fusion. Like Indian/Chinese! Which I now have to study up on...

Here's one of the dishes we enjoy regularly. It's incredibly simple and can easily be converted to a vegan version. It makes use of pre-cooked rice from previous meals, as well as pre-cut veggies from others, so it's non-wasteful and budget-stretching.


Chinese Fried Rice

This is such an easy dish!  If you have rice in the freezer, and choose to microwave it to defrost, it can take you about 7 min. start to finish to build this tasty, nutritious creation! Less if you have some cut, raw veggies sitting around...

Like many Chinese dishes, many of the ingredients are cooked separately, and then combined just before finishing. According to Jeff Smith in The Frugal Gourmet Cooks in Three Ancient Cuisines: China, Greece, and Rome , "in order to bring each food product in a particular dish to its own point of fulfillment, you must cook several ingredients separately, and then join them together in the wok at the last moment. In this way you have contrast in both flavor and texture, all in the same dish."

I use a small carbon steel wok for this. It's just the right size, imparts some iron, is highly efficient, and needs very little oil to cook with.  One of the perfect Global Peasant cooking tools!  I use my wok for everything.  A small wok is one of the best kitchen investments you will ever make, if you don't have one already...

Don't forget to use a high heat cooking oil, like peanut, walnut, sunflower, or safflower.  Soy oil won't cut it, since it is completely non-nutritive.  Canola tastes weird, even when organic, and olive should never be cooked, as it degrades into transfats so quickly.

2-3 cups previously cooked rice, defrosted or partly dried
 
I use organic Jasmine rice with nearly all of my Chinese meals. The flavour is incomparable with any other type of Western or conventionally grown rice, as well as being more nutritious and eco-friendly. I usually steam extra for a meal, and put any we don't eat into the freezer. It's vital to this recipe that the rice sit overnight or is left in the freezer to dry out a bit. Wet or fresh rice will clump and not come out right.

1-2 fresh eggs

Feel free to leave these out if you are feeling vegany. I know that eggs often revolt me, but personally, this dish seems a bit incomplete without them. I haven't tried substituting tofu, though...  Again, organic, local eggs are the clear choice for so many reasons, not the least of which is that they are safer and healthier. The chickens are not constantly exposed to broad spectrum antibiotics, and organic eggs are seven times less likely to contain salmonella.


Start by cooking the eggs. Use very little oil.  I find too much makes the eggs a bit greasy. Stir fry. The effect you are looking for is a bit like scrambled eggs. Set aside.


frozen or fresh peas

I find peas to be integral to the dish. I can't even make it without them. If they are frozen, I put them in first for a minute or so. Then the remainder of the veggies. It's the only time I cut up carrots like those little cubed frozen ones. It's more fun, and rather like the take-out style. Same with the mushrooms, and sometimes the peppers. Onions, scallions, whatever you like! I often use pre-cut veggies from a previous meal, say from tacos or falafel. Anything we didn't use gets saved for a day or two, and goes into fried rice or omelets.


Veggies should be about the same size, for ease of cooking time and for the look of the dish.

This is the time to sprinkle in your seasonings.  Salt, pepper, and maybe some five-spice powder, fennel or anise. After a few minutes of cooking, set aside on the same plate as the eggs.


Defrosted jasmine rice in wok
Time for the rice!


Make sure it's pretty well thawed, and stir fry with a bit of oil to remove any clumps.  Add the soy sauce or tamari.  Again, only organic is recommended, since it is made with non-GMO soybeans, which should be avoided.  Just a little!  A tablespoon or two.  It's easy to overdo it, and your guests often add a bit more to their taste at the table.


Rice sprinkled with tamari

After cooking for a few minutes, it should be pretty cooked through and mixed with no lumps.
 

Rice stir fried.


Now add the rest of the ingredients. Stir fry for a few moments, reheating and distributing evenly.


Your dish is complete! I usually just serve it in the wok itself. Eat alone for satisfying lunch or snack, or as an accompaniment to a larger meal.

Now I'm all hungry...